Your first booking on WoofWalk, step by step
Someone has asked to book you. This page takes you from that request to getting paid, one tap at a time. Every step shows what you tap, what you see and what the dog's owner sees. It looks long because nothing is left out. Your first booking takes about ten minutes of tapping spread over the day. Your second takes two.
The pictures are from the Android app on a test phone. Two of the early ones show '$15.00' because the test phone was set to US English; on a UK phone you see pounds, as the later pictures do. iPhone pictures will be added wherever a screen differs.
Before you tap anything: 60 seconds on how you get paid
Card payments. Owners can pay by card when they book, but only once you have connected Stripe, the company that takes the card payment and pays it into your bank. Do it on the website: go to woofwalk.app/business/settings, open the Payments tab, tap Connect Stripe Account and follow the short form. Connecting Stripe also earns you £3 of starter credit.
Cash. On the same screen, switch on Accept Cash Payments and owners can book and pay you in cash on the day. You can have both on.
Before you make a booking on the website yourself, finish Stripe setup. For now, a booking made from the website is a card booking, and the app only looks for your Stripe account when the owner comes to pay. Without Stripe the booking sits at 'awaiting payment' and the owner cannot pay you. Connect Stripe first, then make the booking.
1Switch the app to Business mode
What you tap
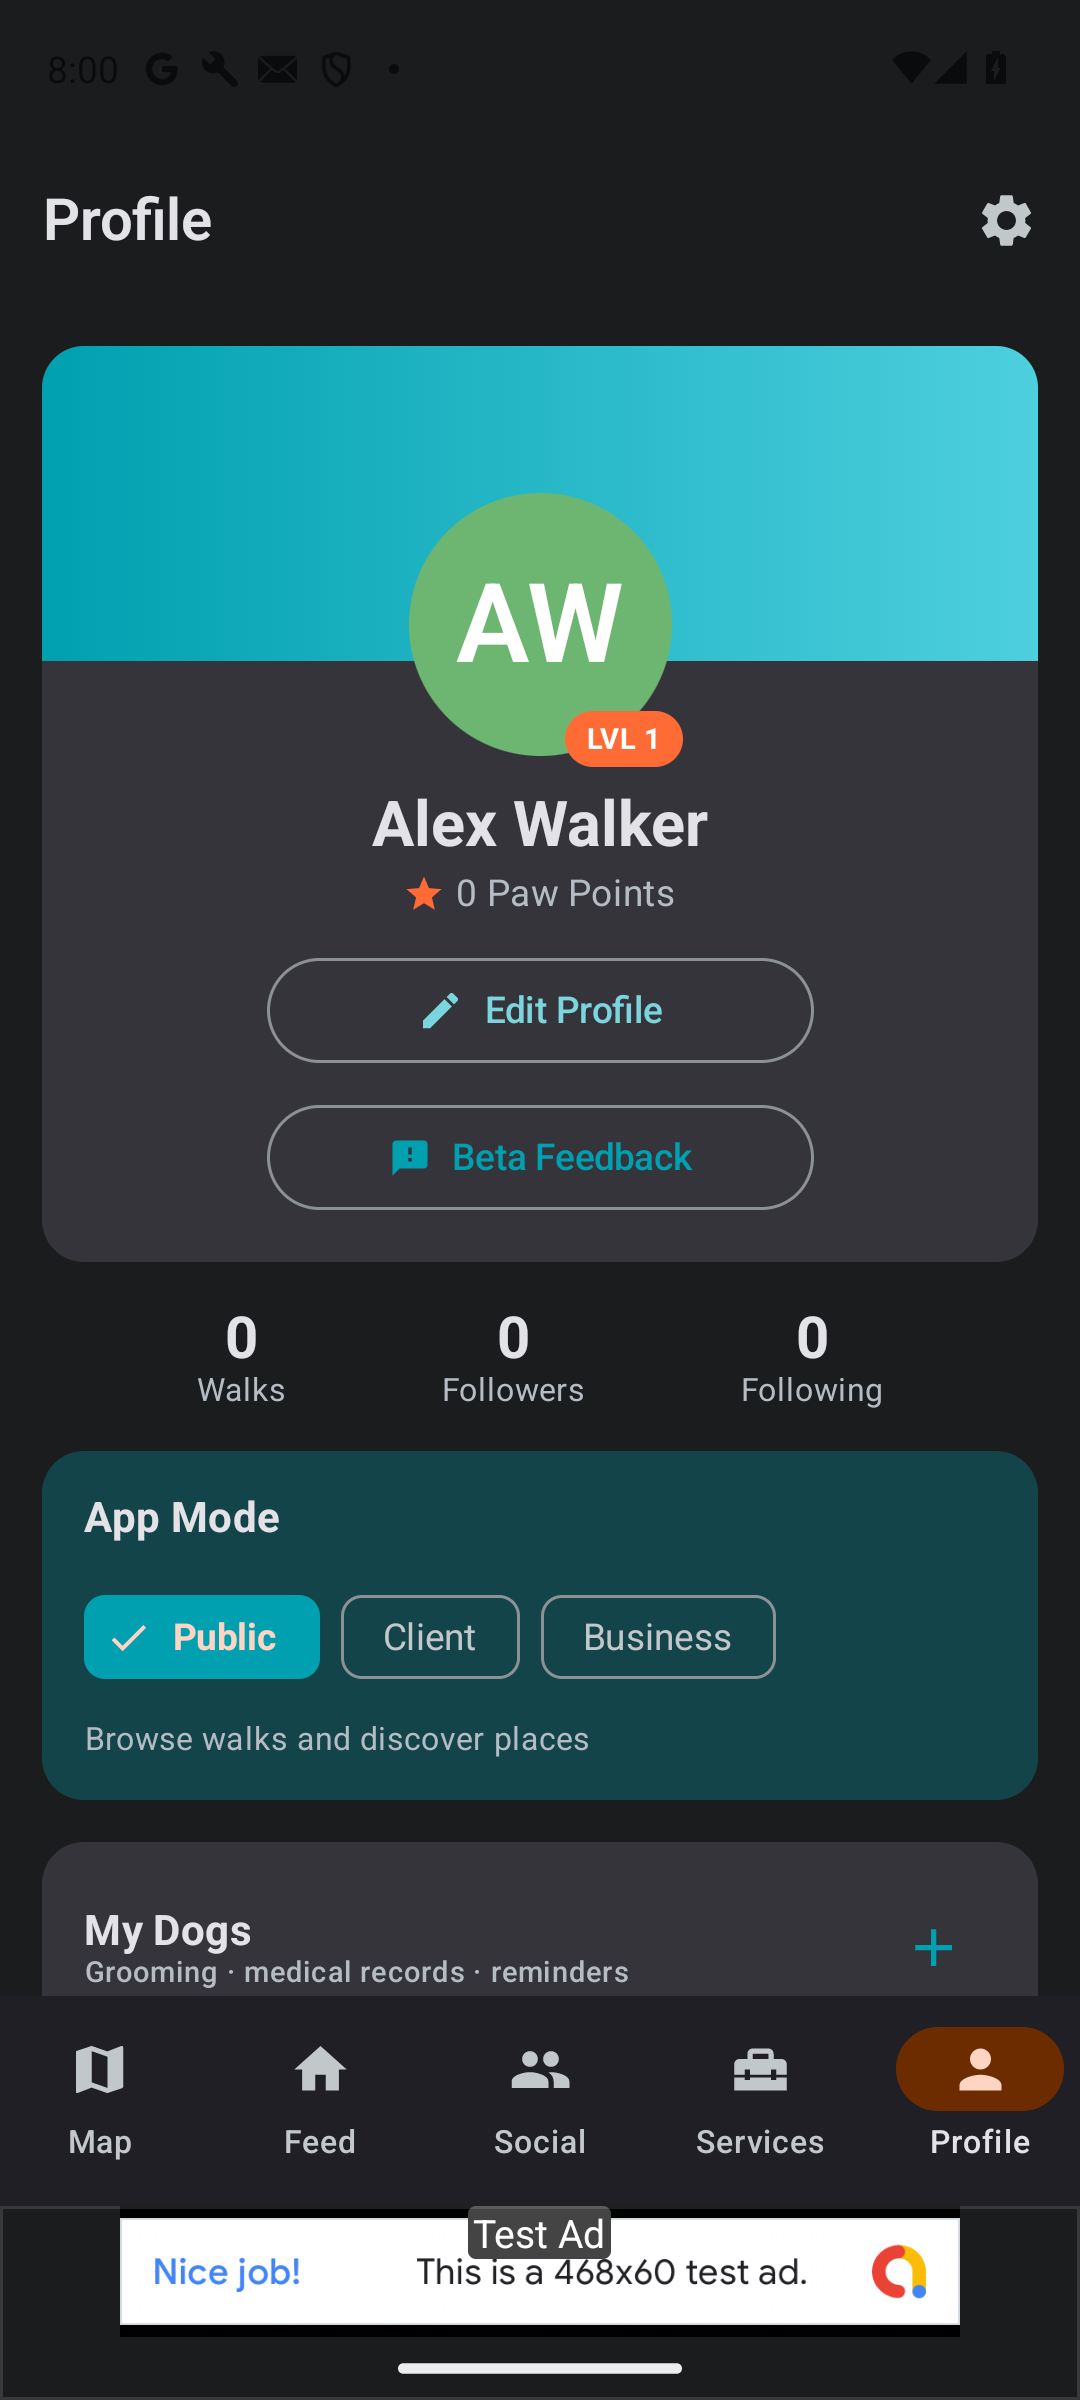
- Open WoofWalk and tap Profile (bottom right). Under App Mode, tap Business.
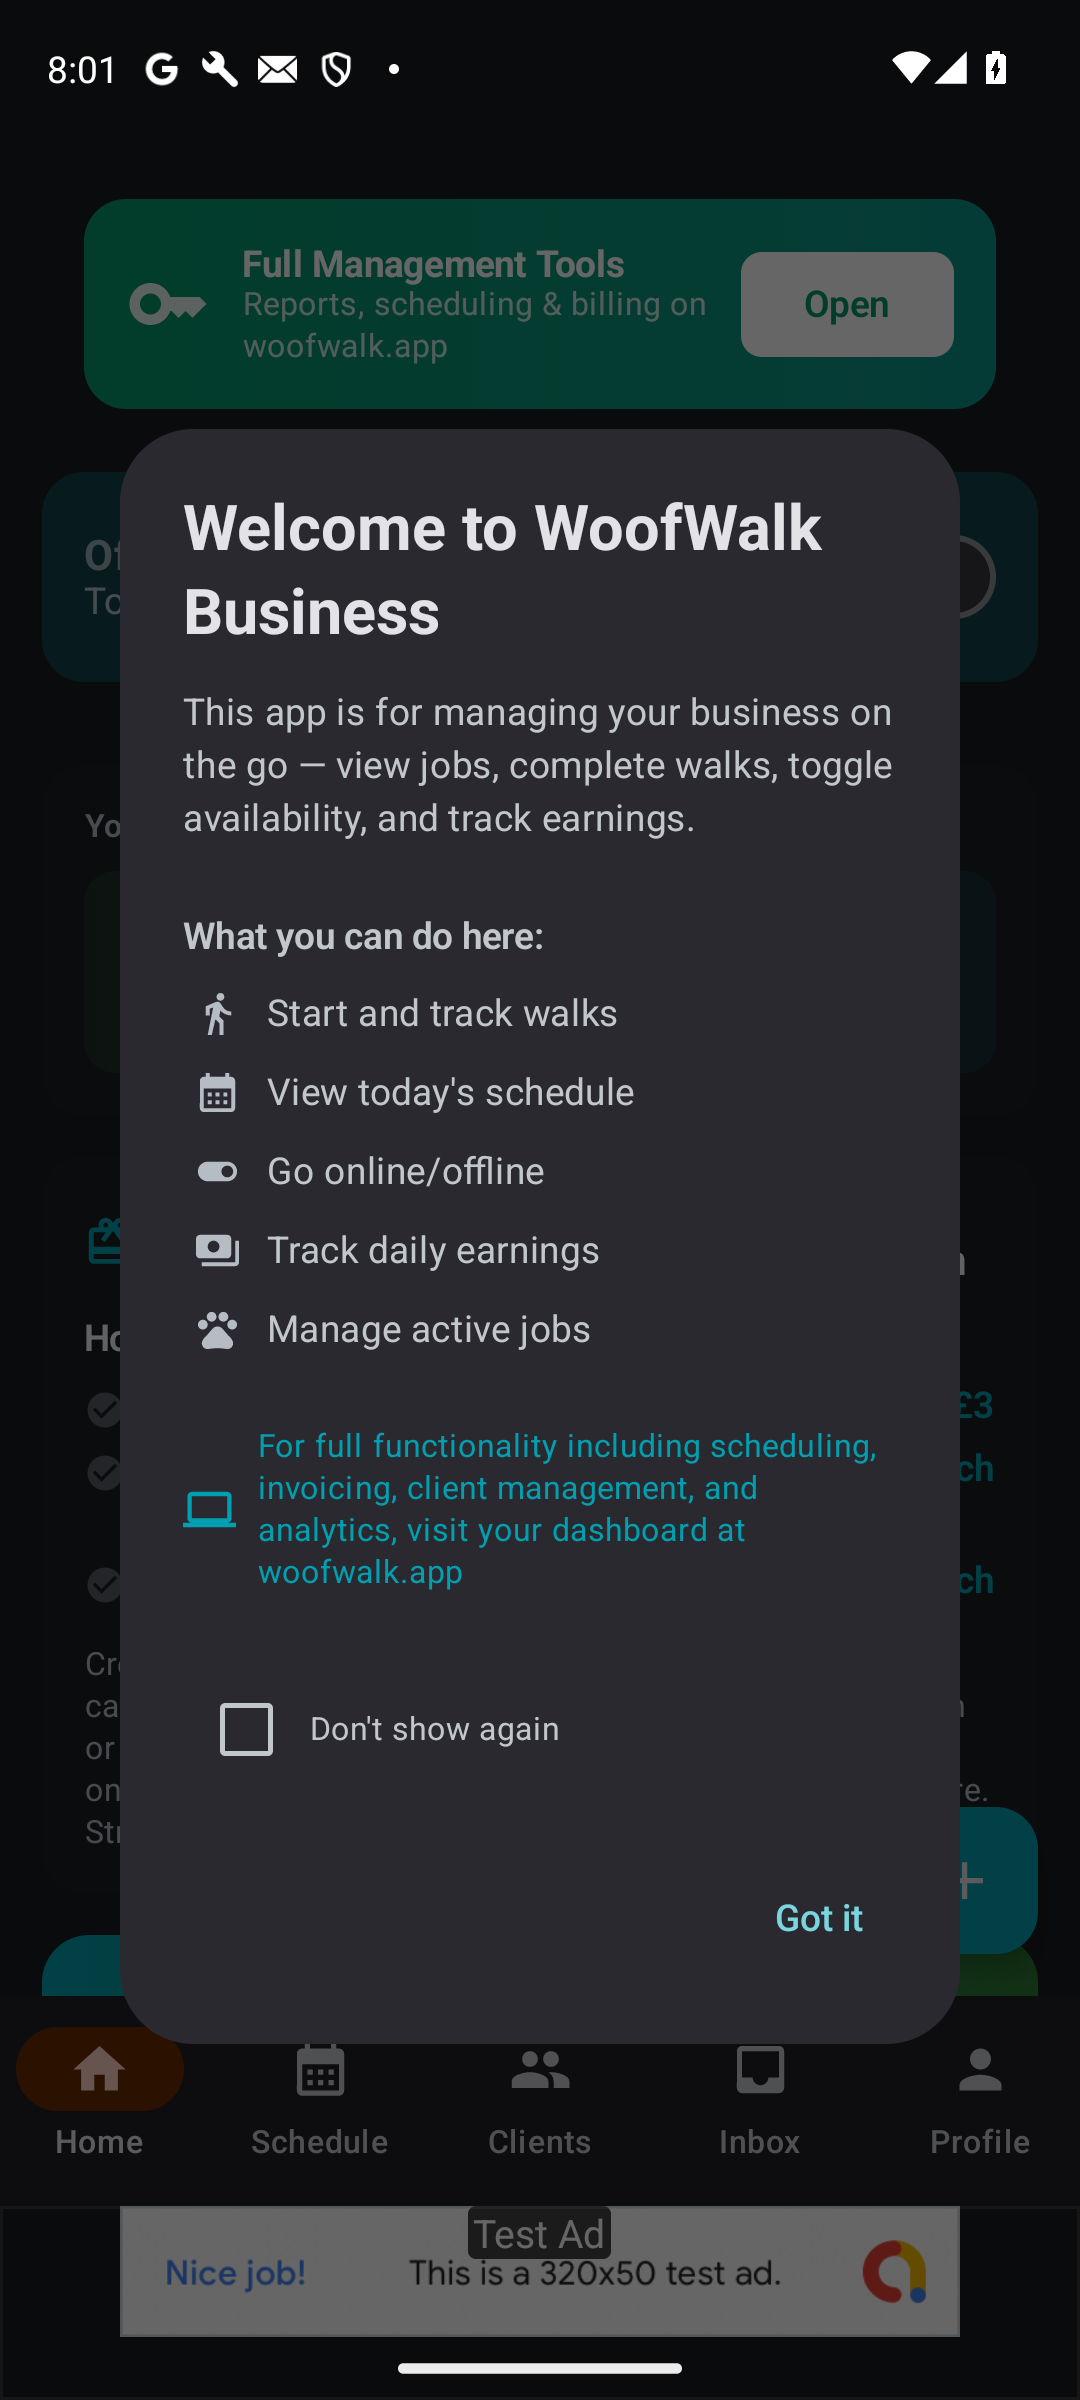
- The first time, a Welcome to WoofWalk Business box explains what the app does. Tick Don't show again and tap Got it. If you don't tick it, the box comes back every time.
What you see
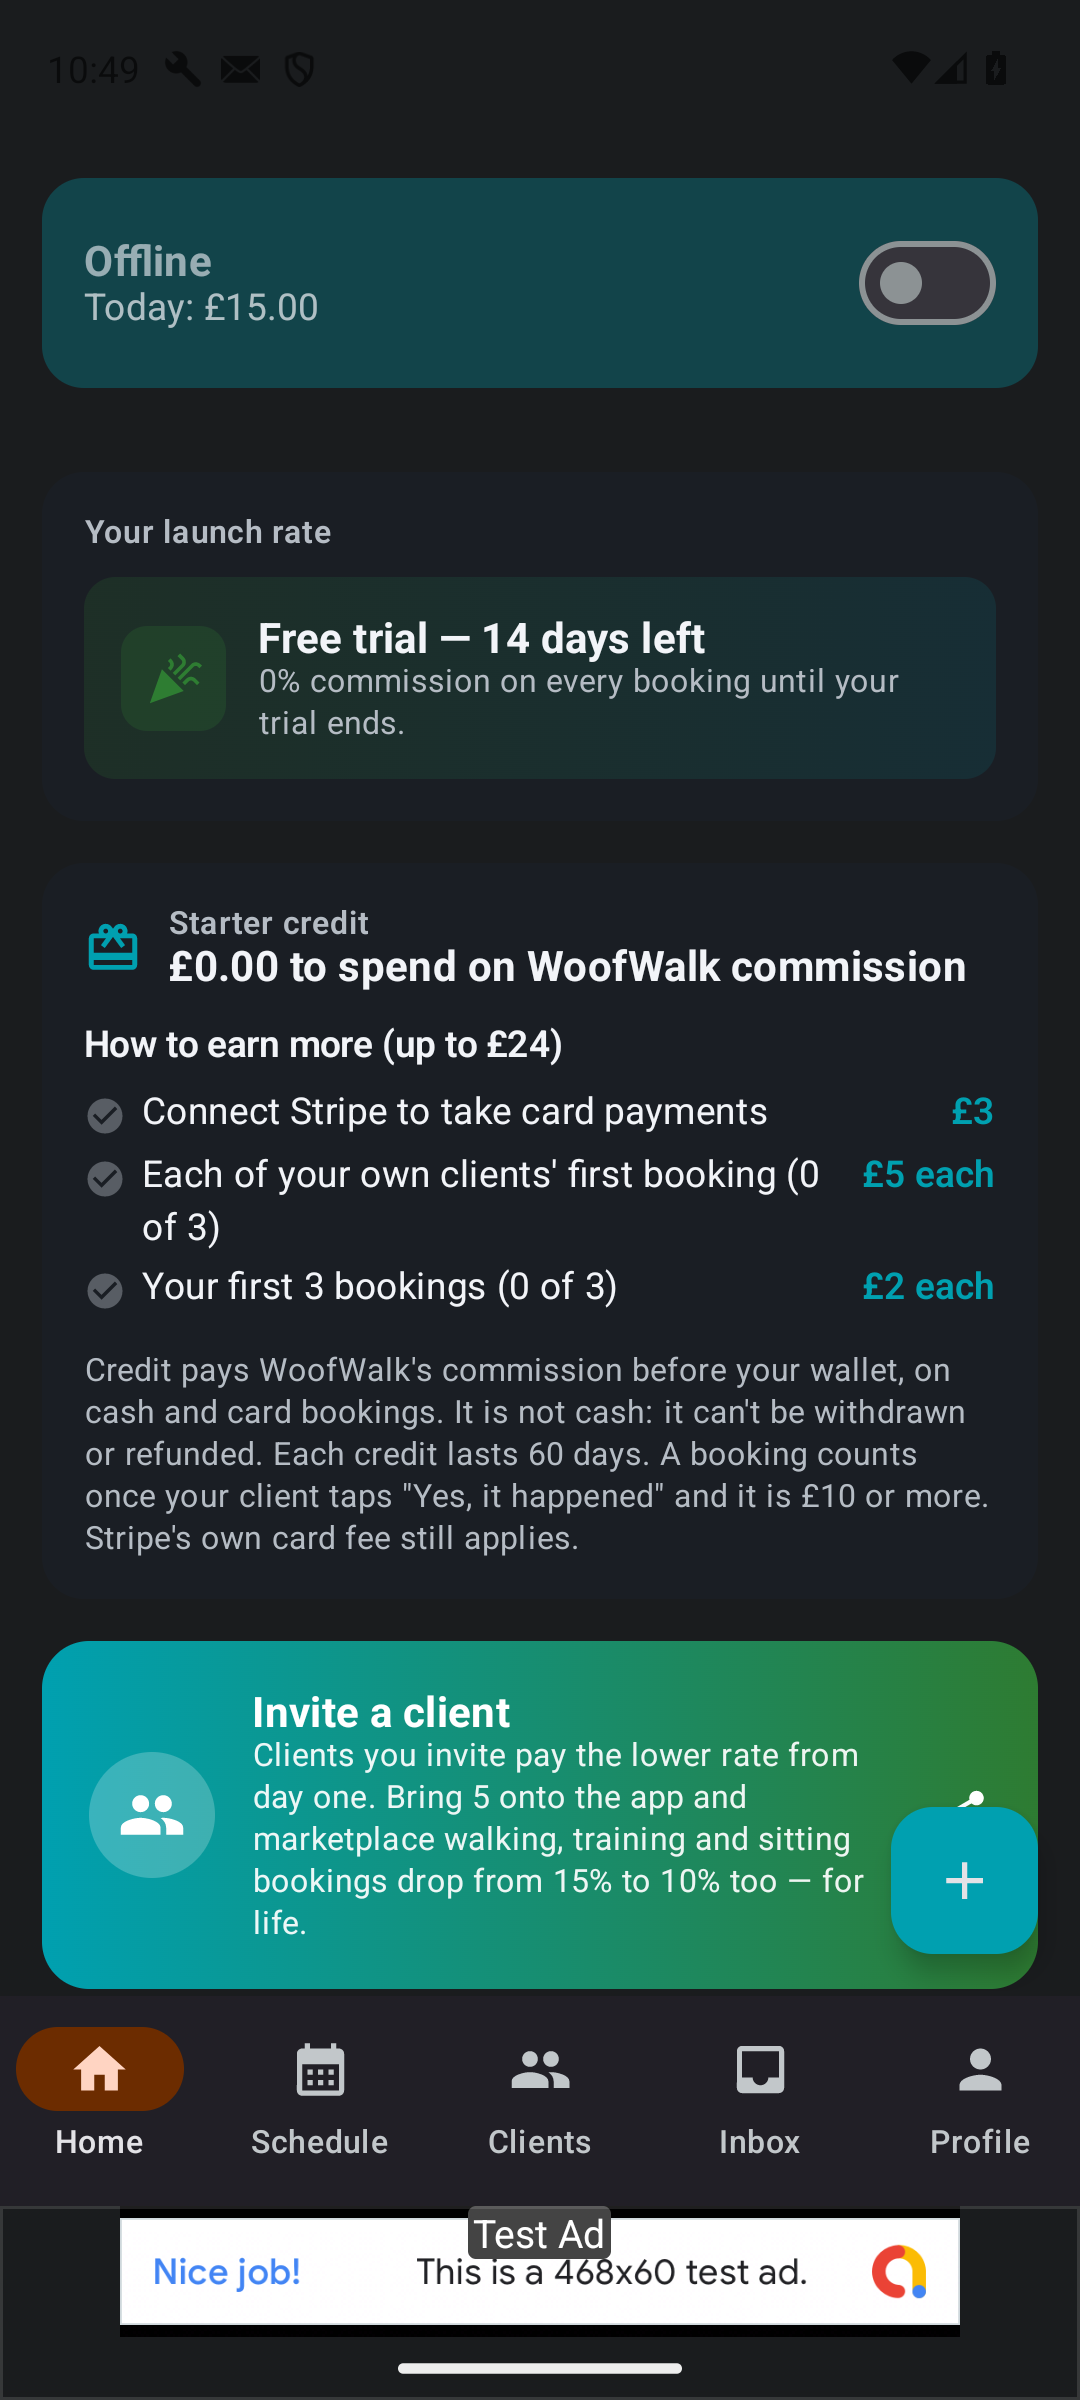
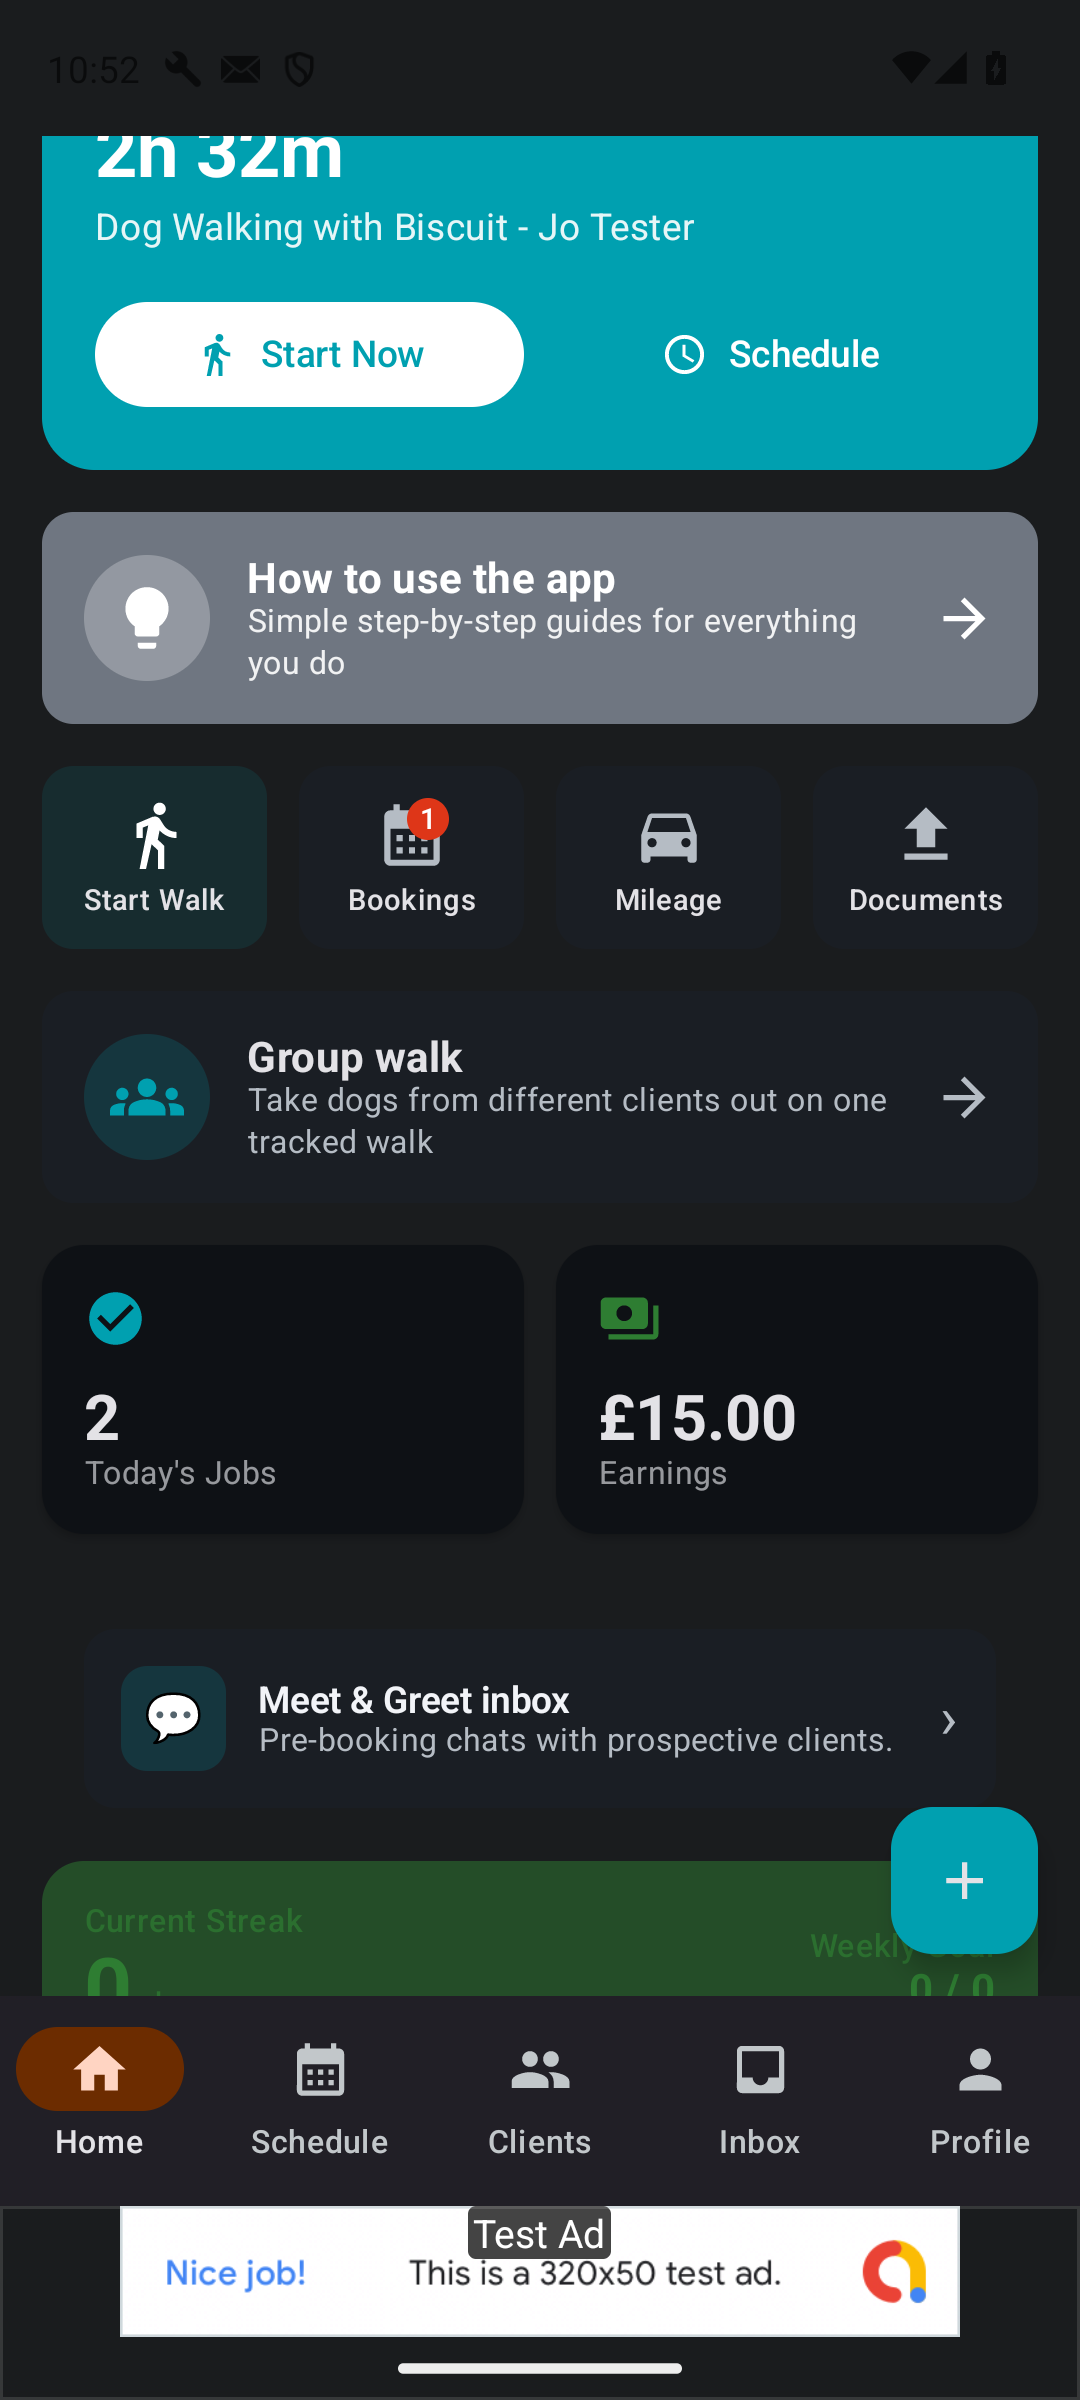
- Your business Home screen: whether you are online or offline, your free-trial status, your starter credit, and further down the Start Walk, Bookings, Mileage and Documents tiles.
2A booking request arrives
What you see
- You get a notification on your phone, and the request appears in your Schedule.
What you tap
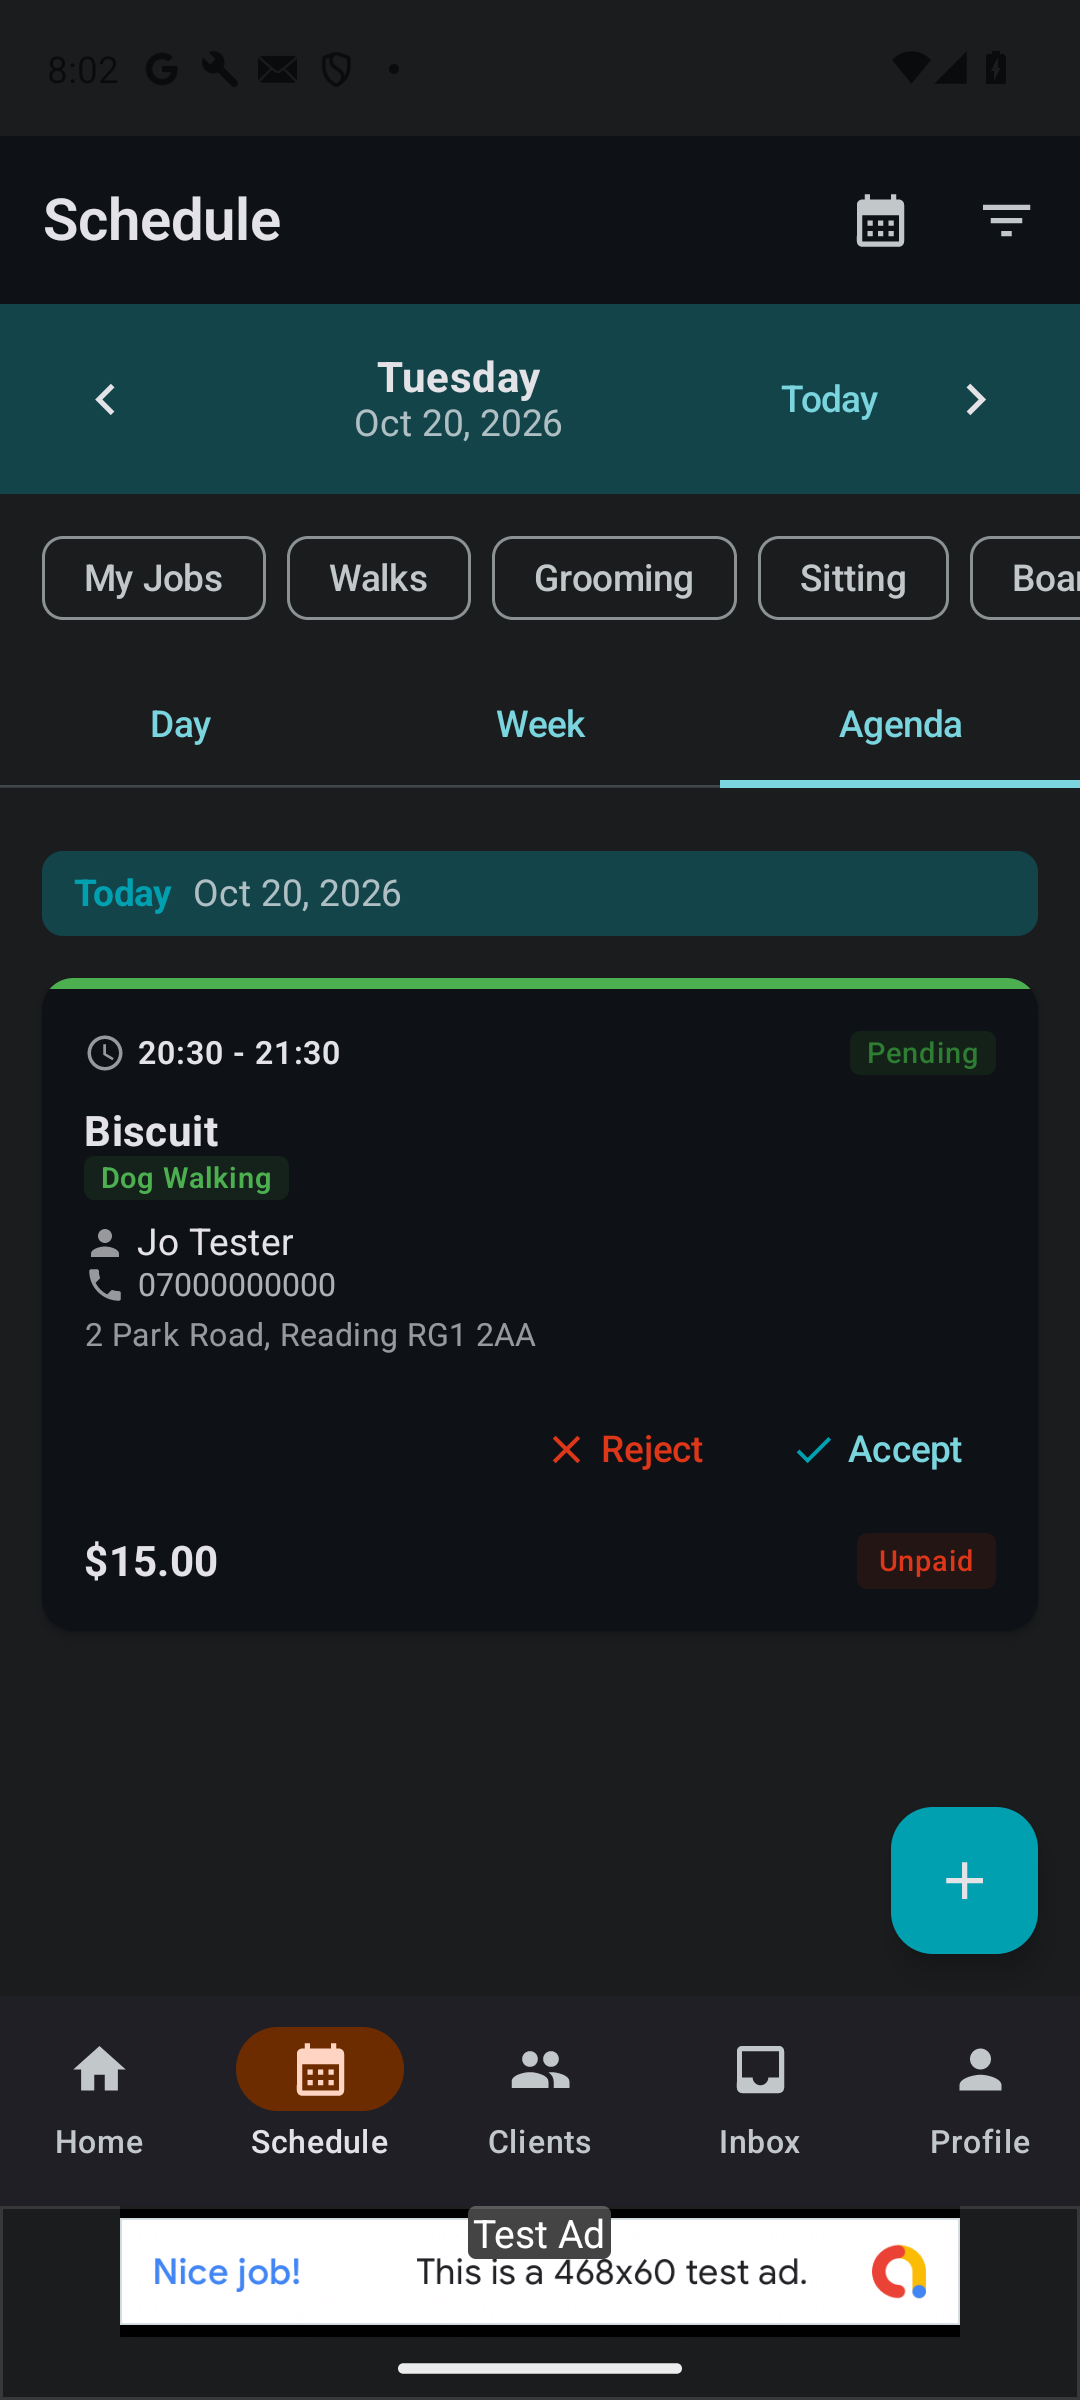
- Tap Schedule at the bottom, then the Agenda tab at the top right. The request is there, marked Pending, with the time, the dog, the owner's name, phone and address, the price, and two buttons: Reject and Accept.
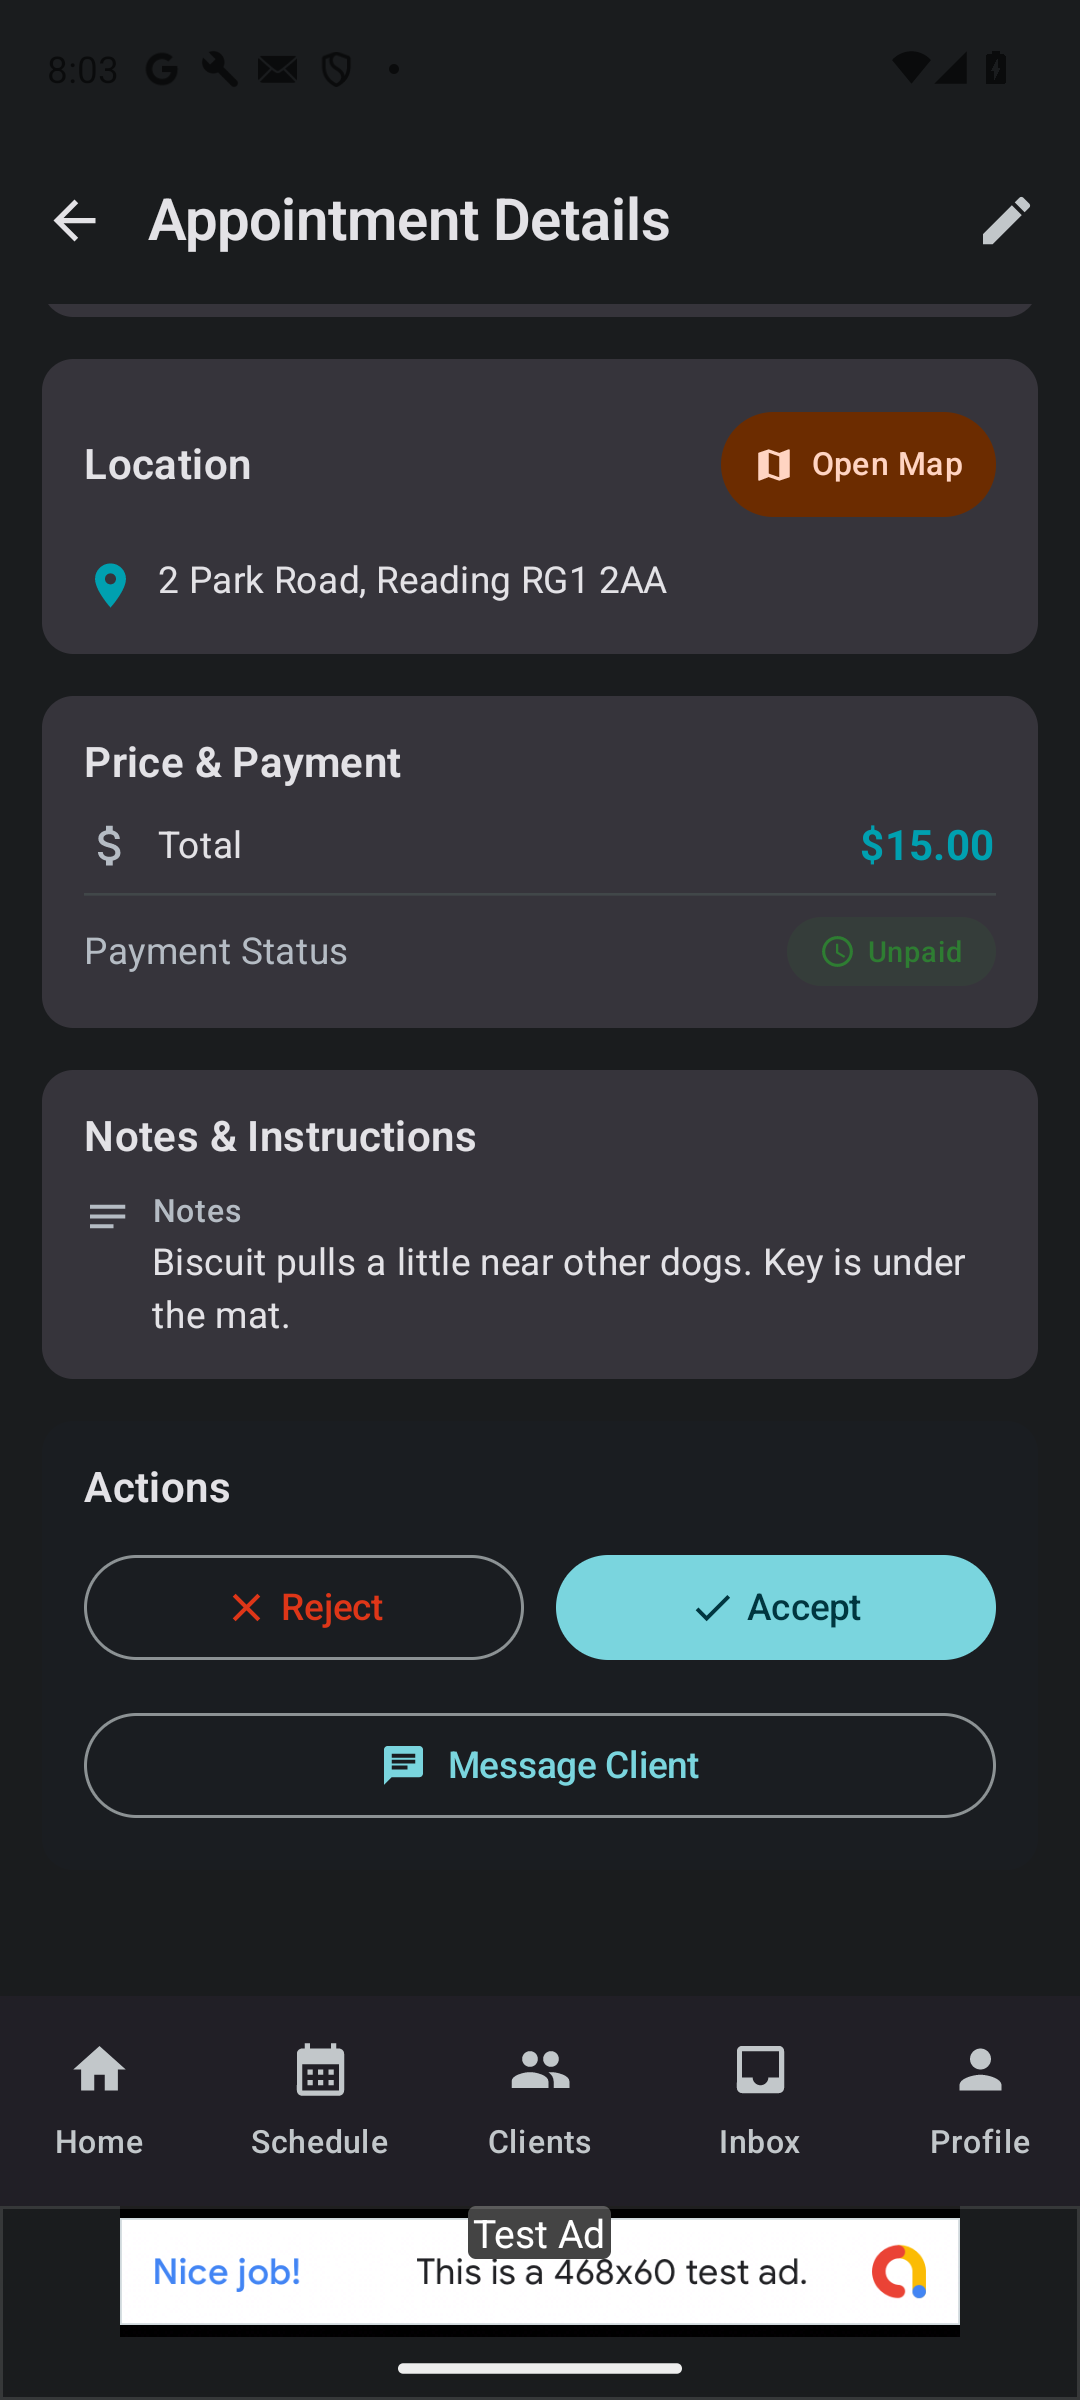
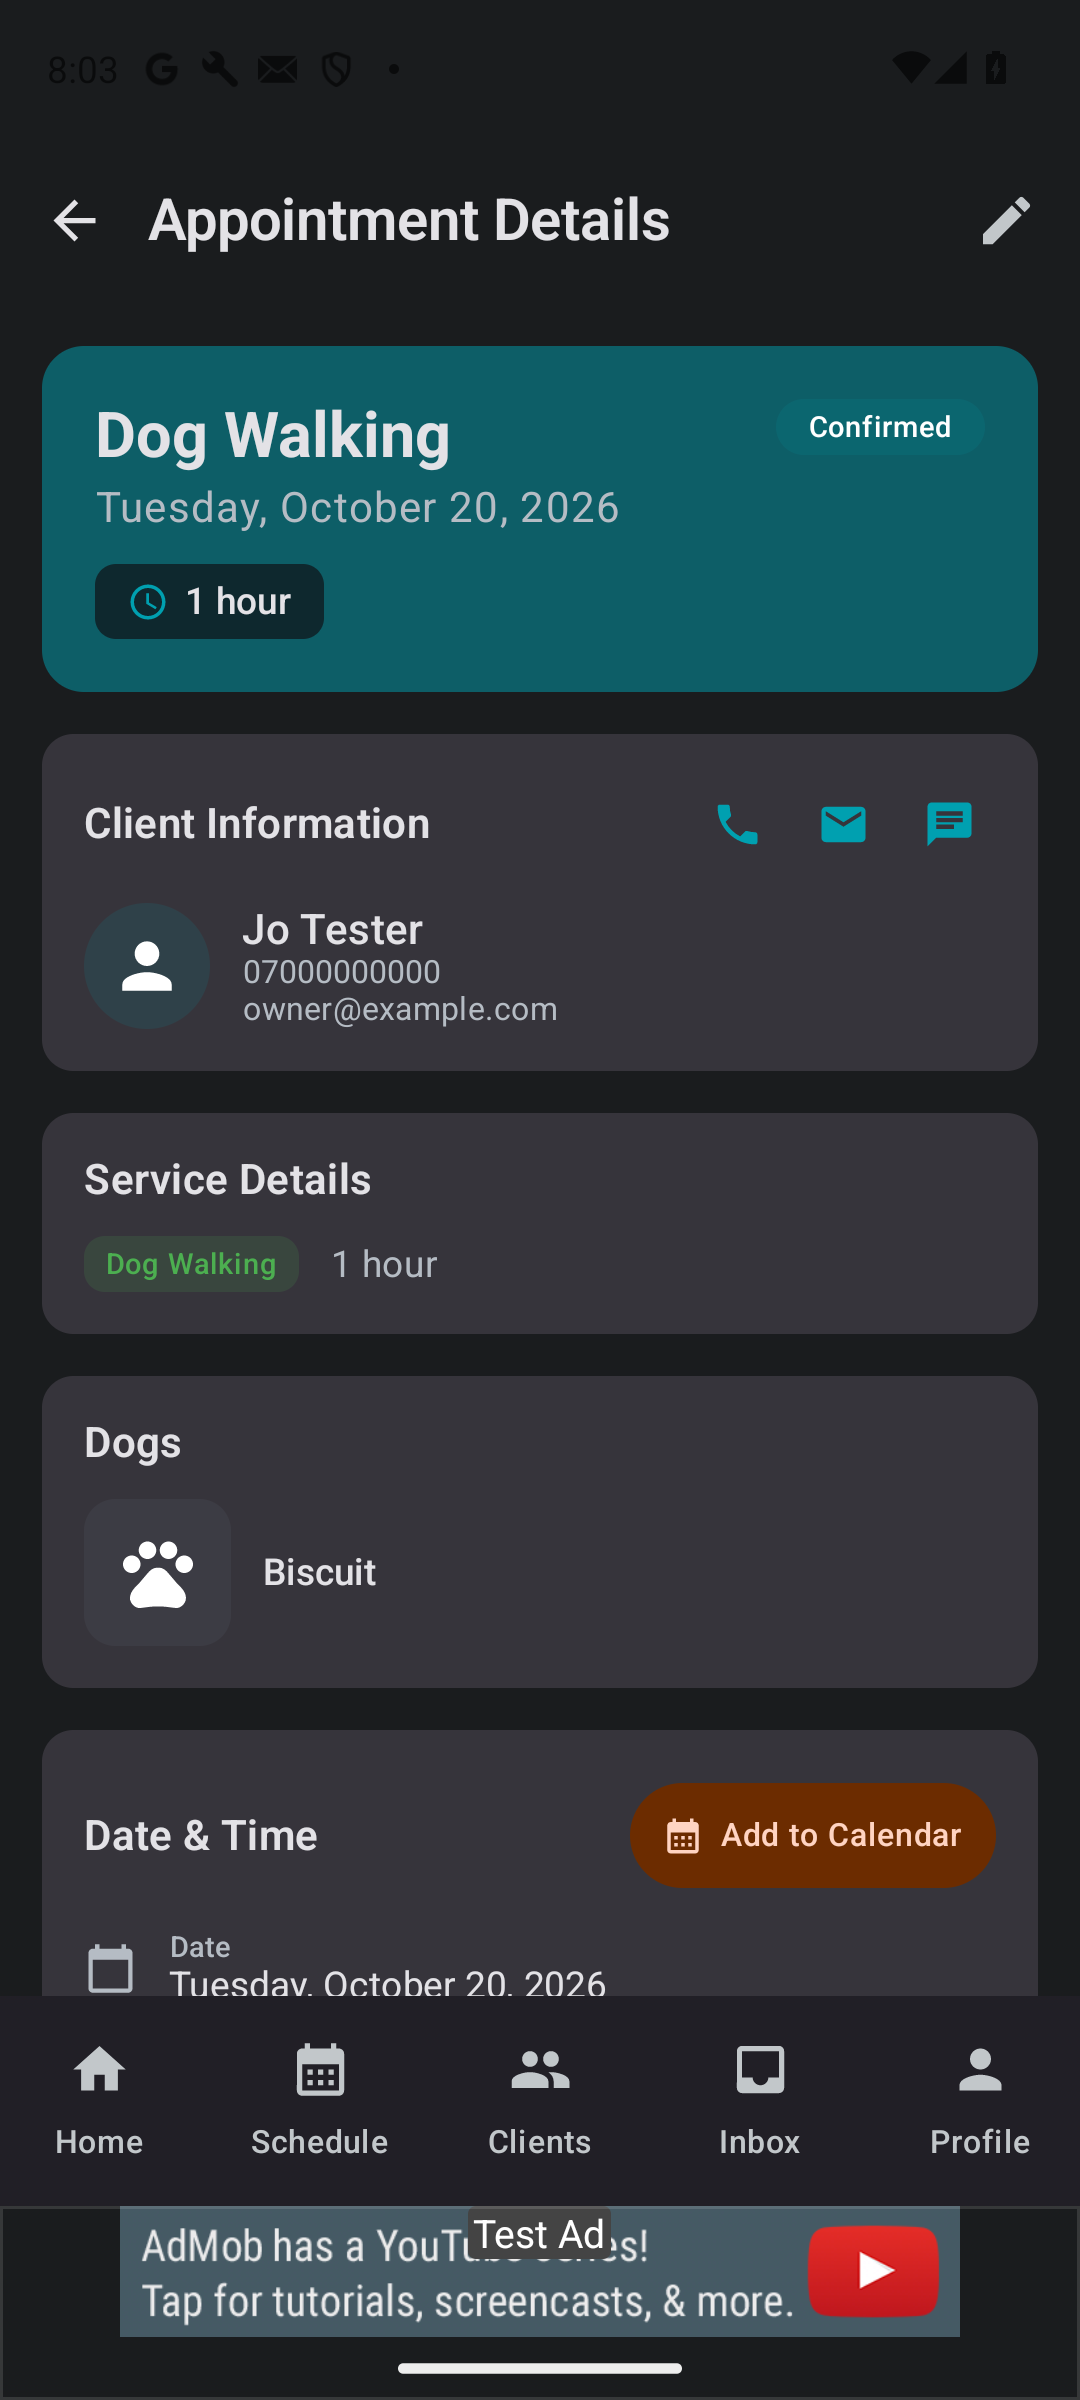
- Tap the request. Appointment Details shows the owner's phone, email and message buttons, the dog, the date and time (with Add to Calendar), the address (with Open Map), the price, and the owner's notes, such as 'Key is under the mat'.
- Read it. If you can do it, scroll down to Actions and tap Accept. The badge at the top changes from Pending to Confirmed.
- Not sure about something? Tap Message Client and ask before you accept. Messages between you and the owner are not fully working yet, so phone them if it matters. Can't do it at all? Tap Reject.
What the owner sees
- The owner sees the booking as confirmed under their Bookings.
On the website: woofwalk.app/business/bookings, open the booking and accept it there.
3It is now a booking
What you see
- The booking now shows Confirmed. In Schedule, the Day, Week and Agenda tabs show what's coming; the top card on Home shows your next job.
What you tap
- Nothing else to tap. Turn up on time.
4On the day: start the walk
What you tap
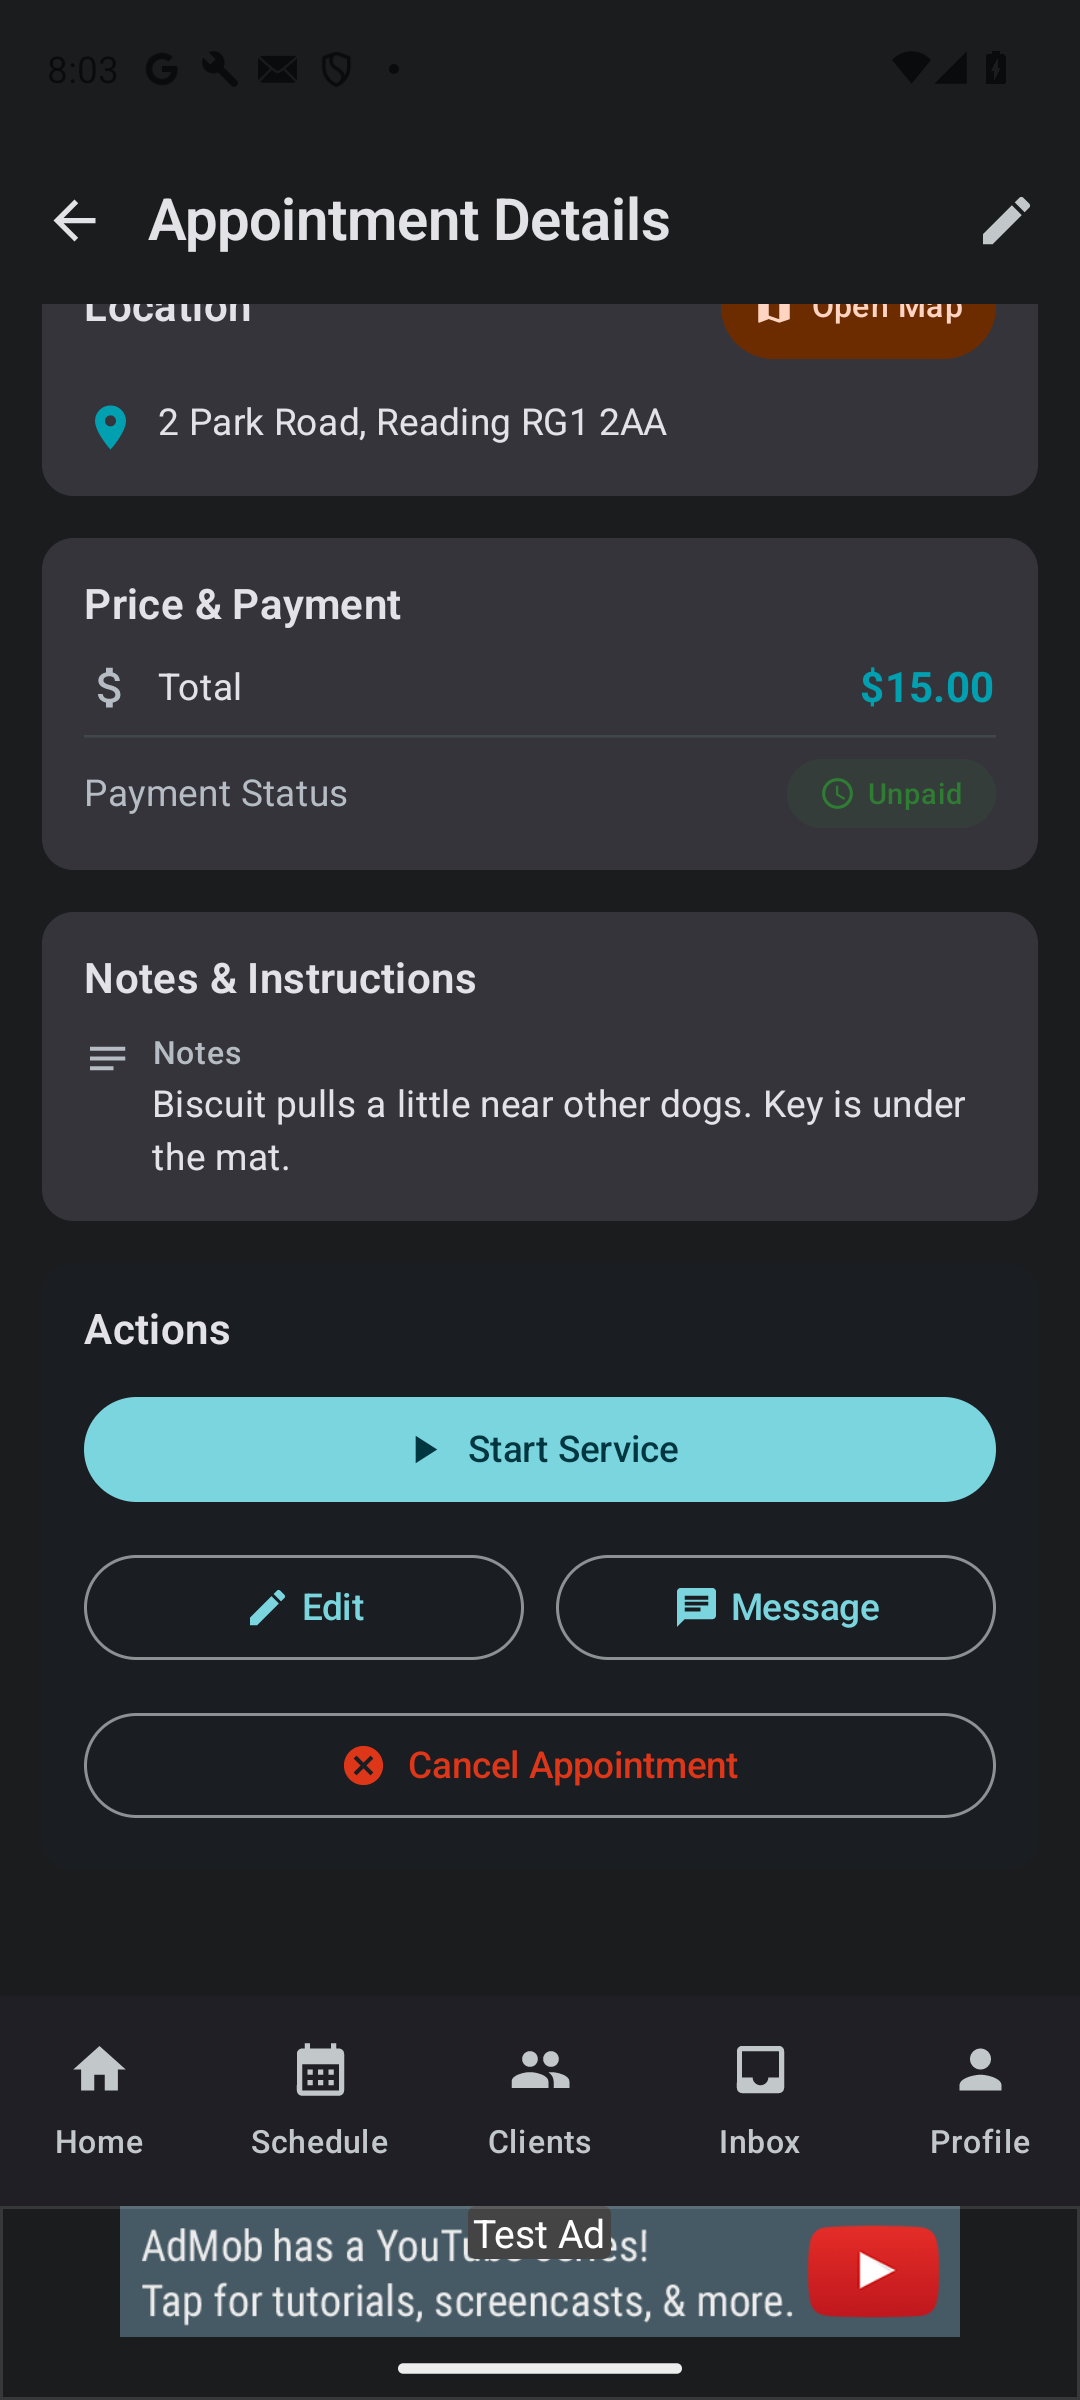
- Tap Schedule, tap the booking, scroll down to Actions and tap Start Service.
- The first time, a box explains why WoofWalk needs your location. Tap Agree and continue, then allow location when your phone asks. Without location the app cannot record your route.
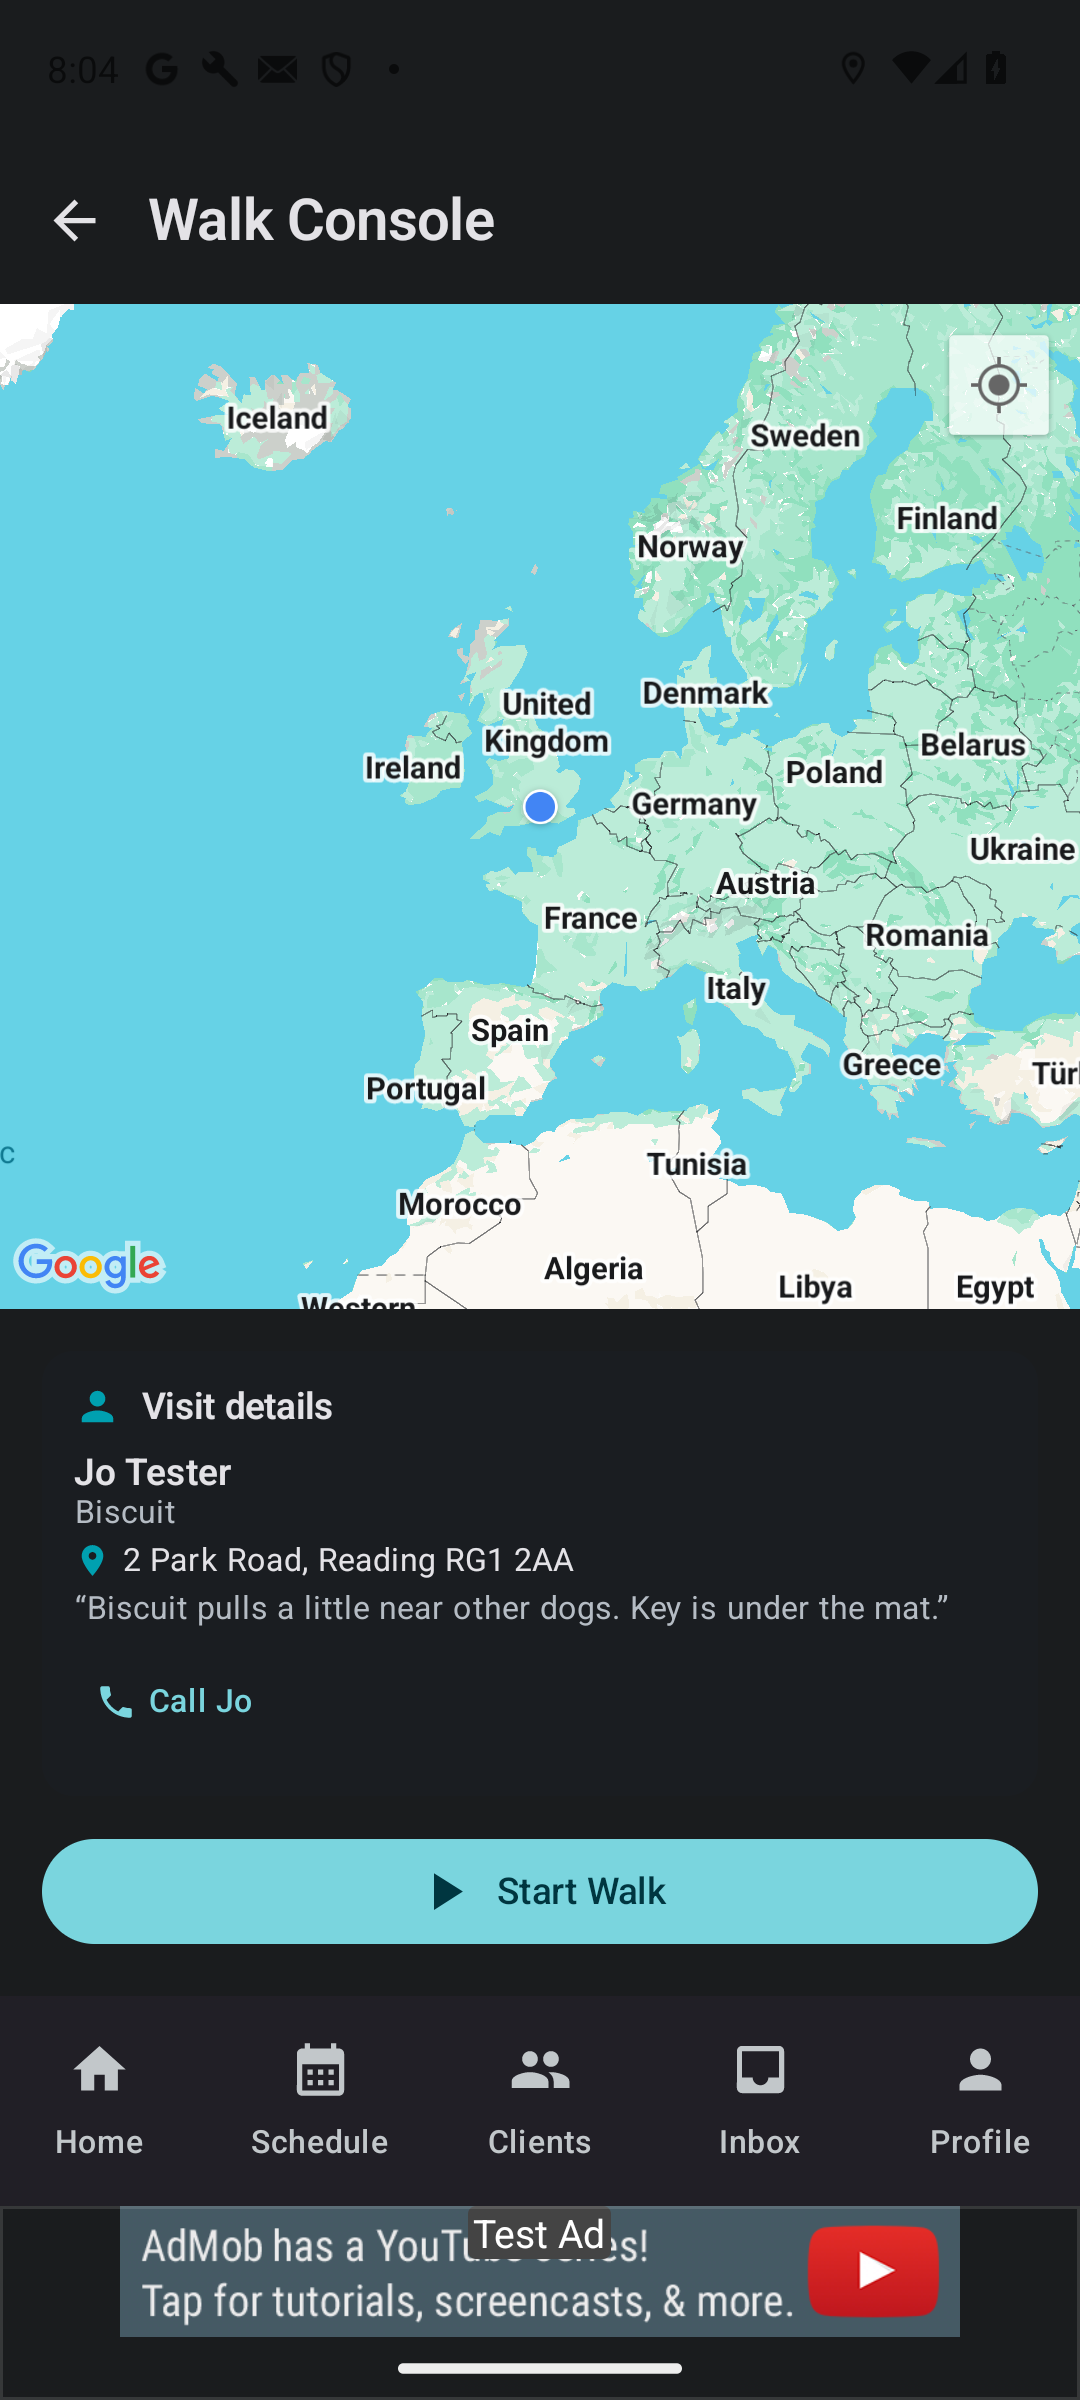
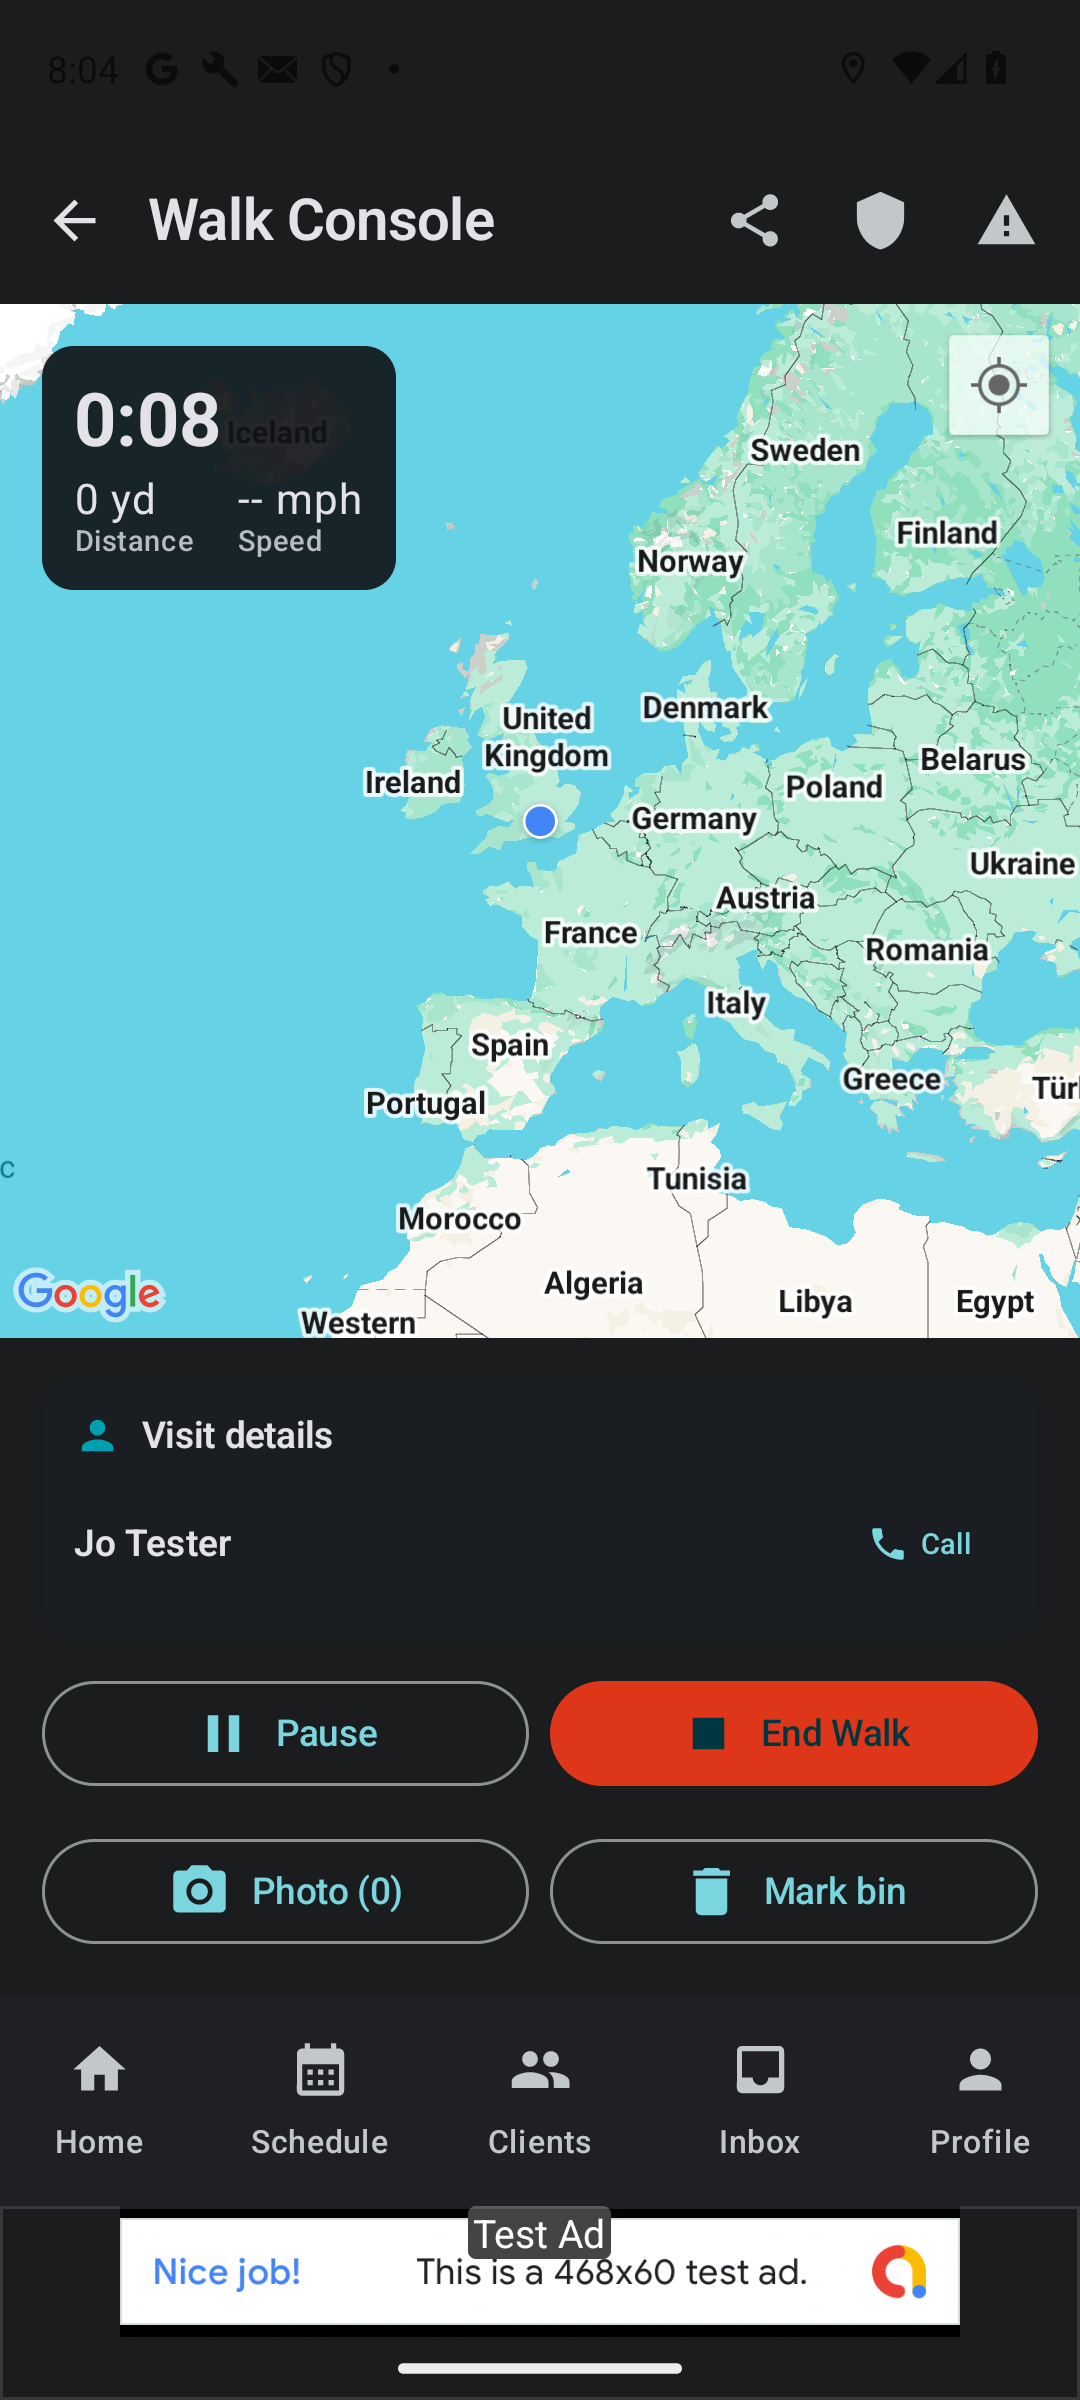
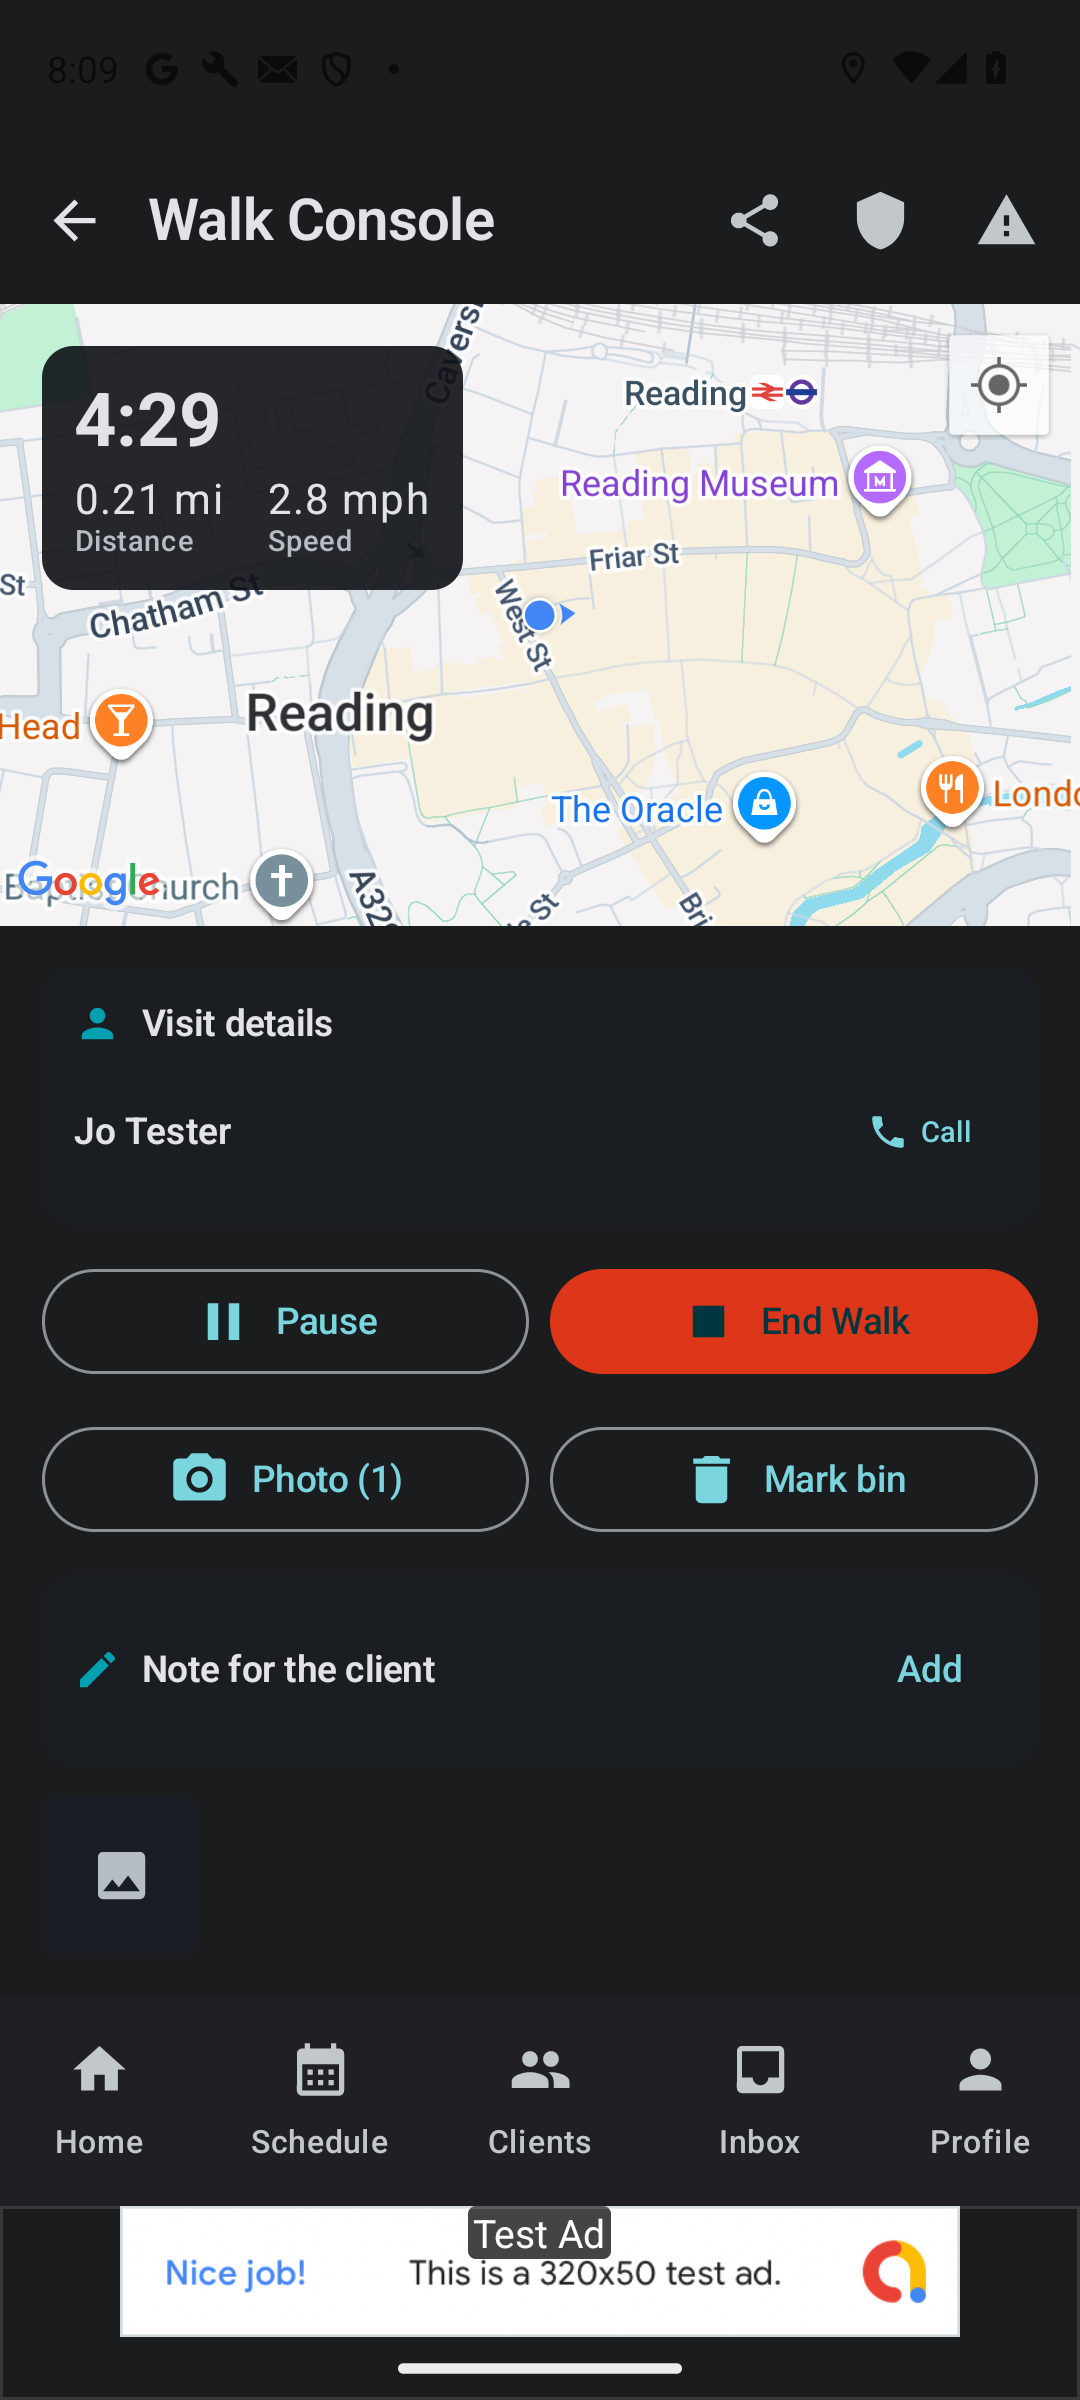
- You land on the Walk Console: a map and a Visit details card with the owner's name, the dog, the address, the owner's note and a Call button.
- Once you have the dog on the lead, tap Start Walk.
What you see
- The timer, distance and speed start counting, and your route is recorded even when the screen is locked.
5Let the owner watch the walk live
What you tap
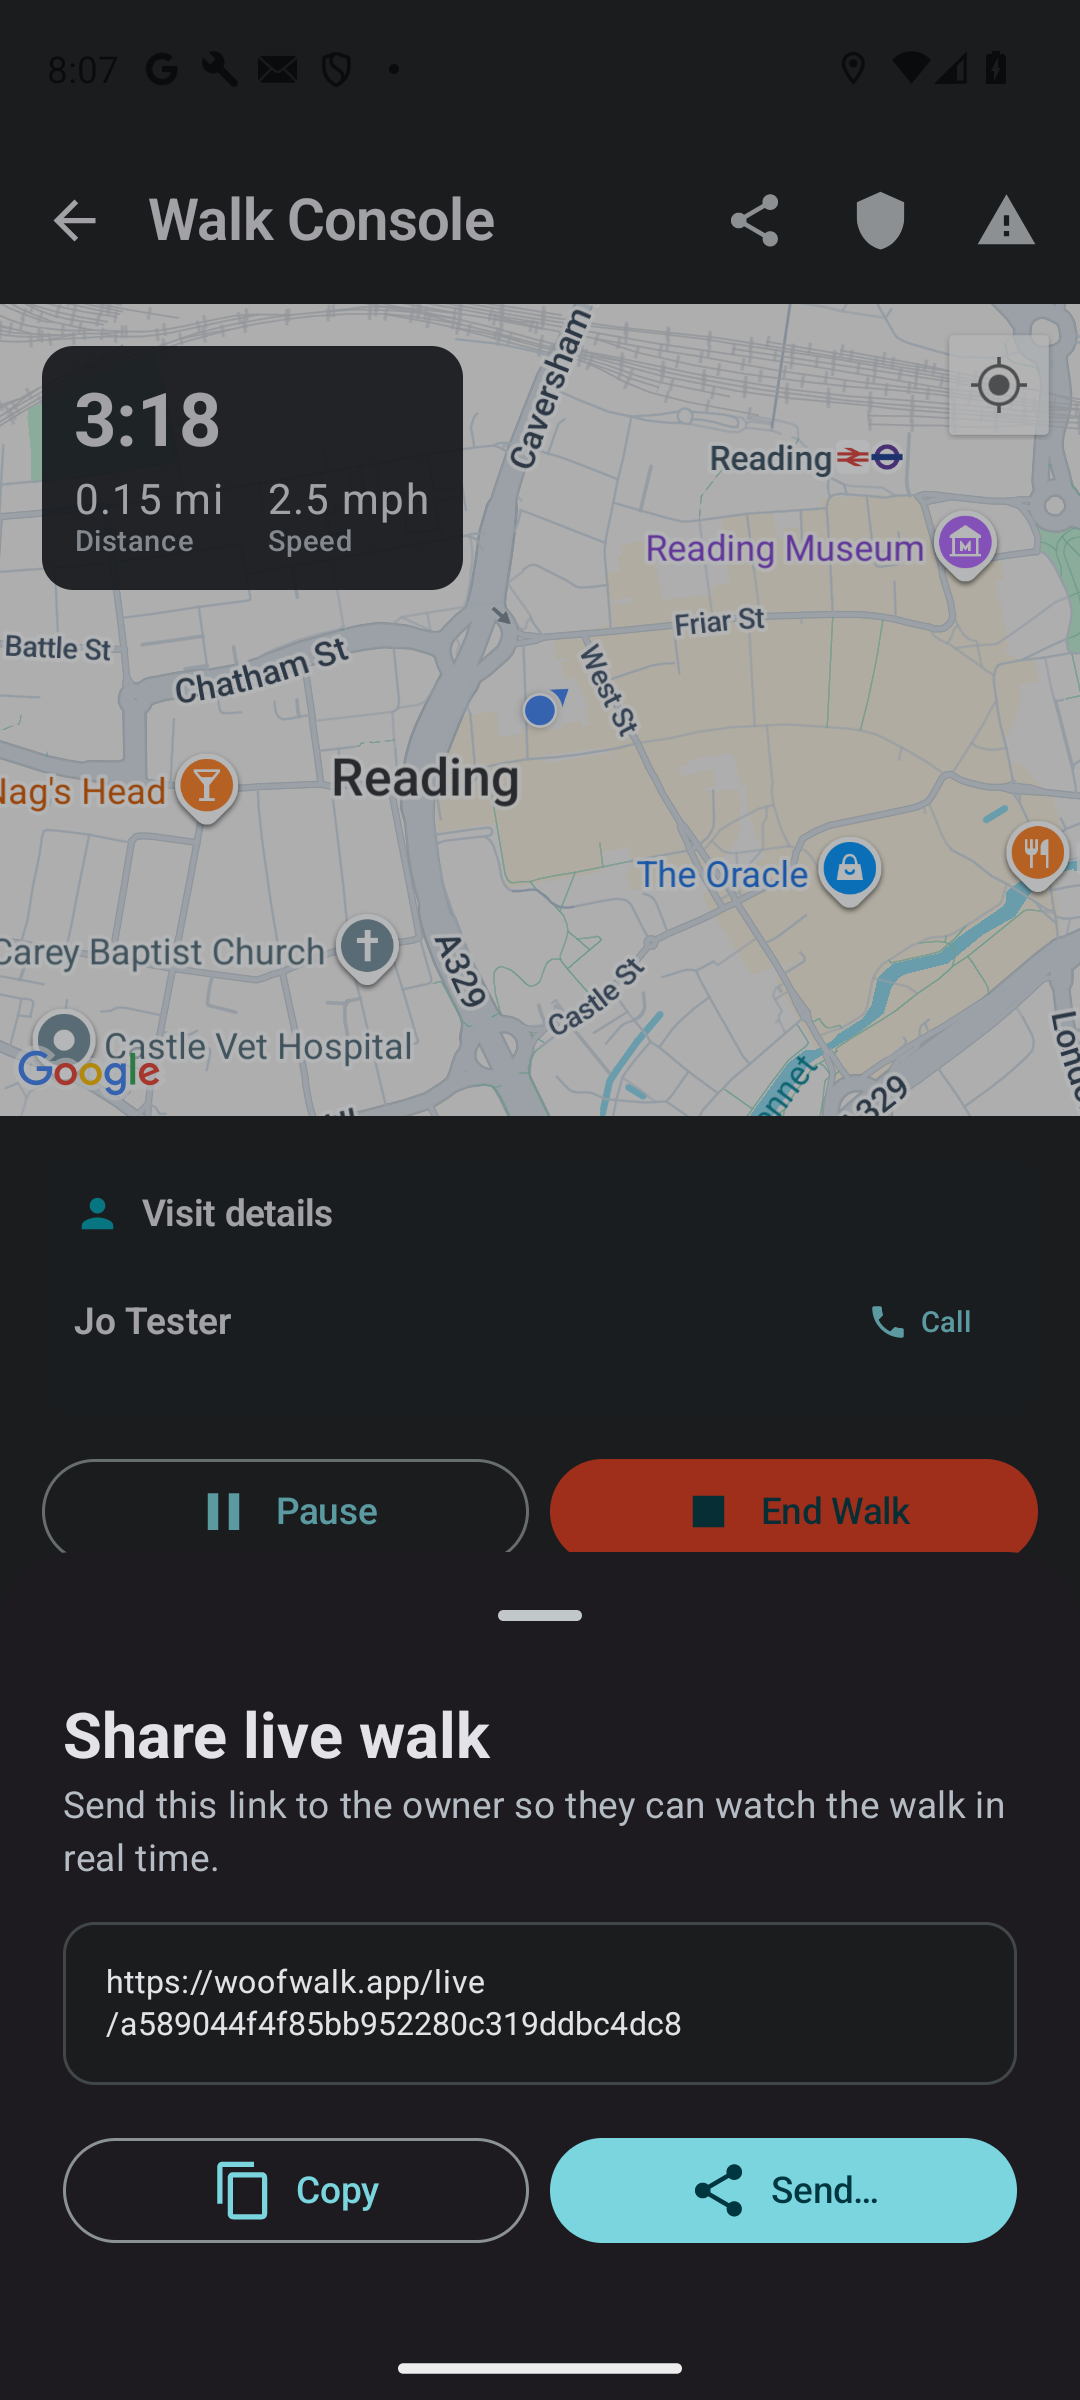
- In the Walk Console, tap the share icon at the top right (three dots joined by lines). A panel slides up called Share live walk, with a link that looks like woofwalk.app/live/... and two buttons, Copy and Send....
- Tap Send... and choose how to send it: Messages, WhatsApp, email, whatever is on your phone. The owner taps the link and watches the walk live.
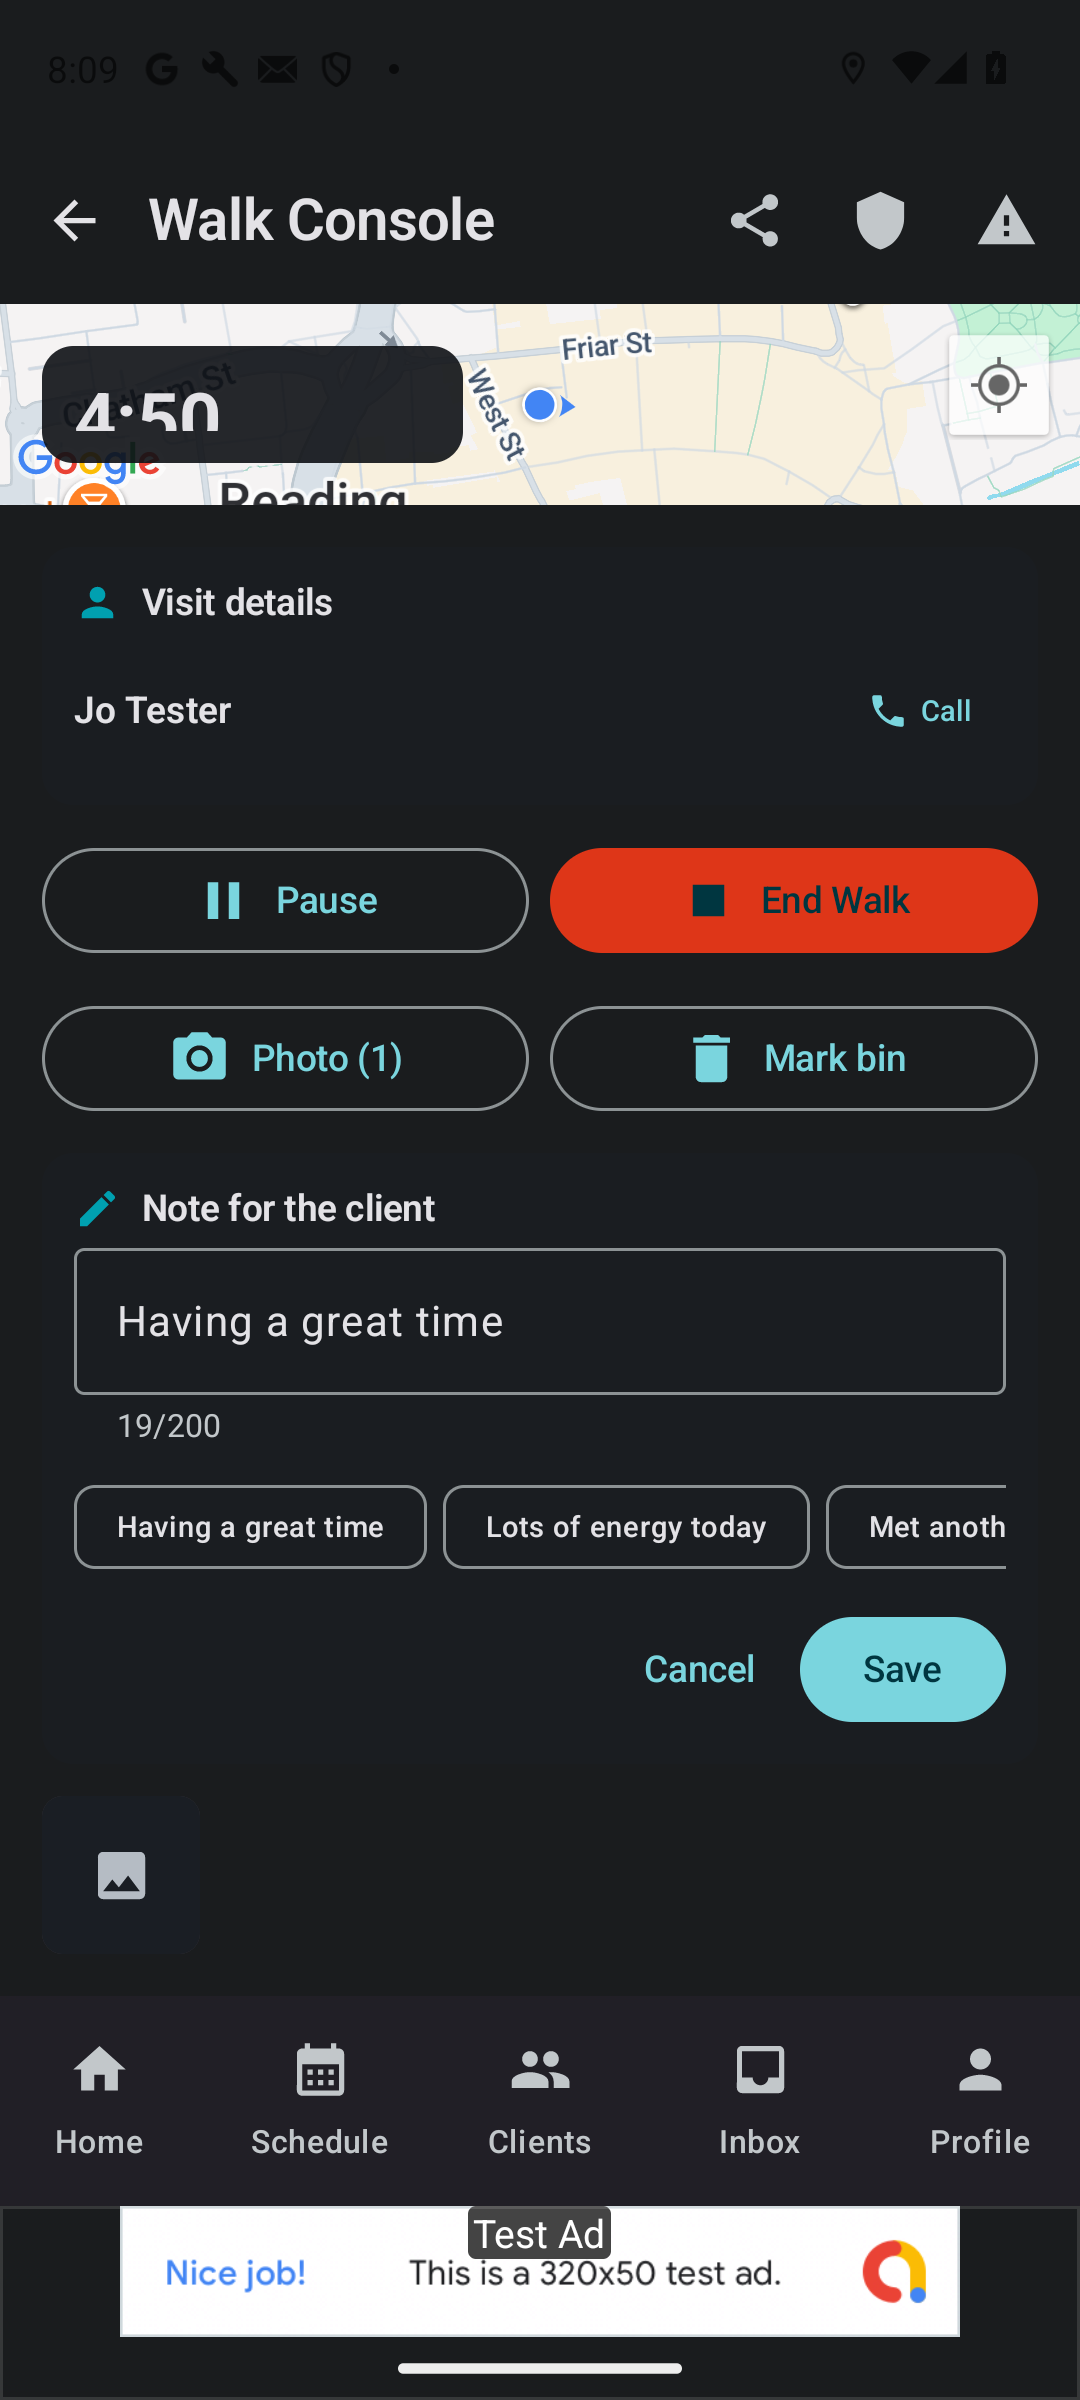
- Optional: once you have shared the walk, a Note for the client row appears. Tap Add, pick a ready-made line (Having a great time, Lots of energy today, Met another dog) or type your own, then tap Save. The owner sees it straight away.
What the owner sees
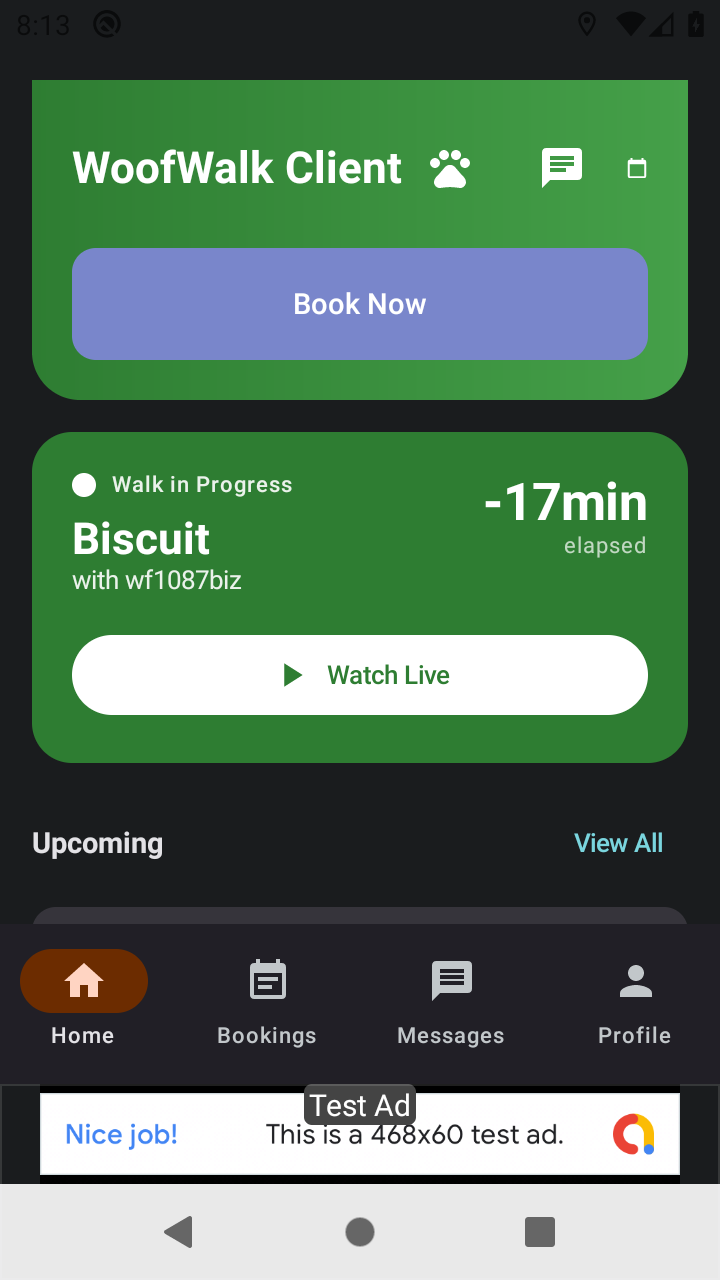
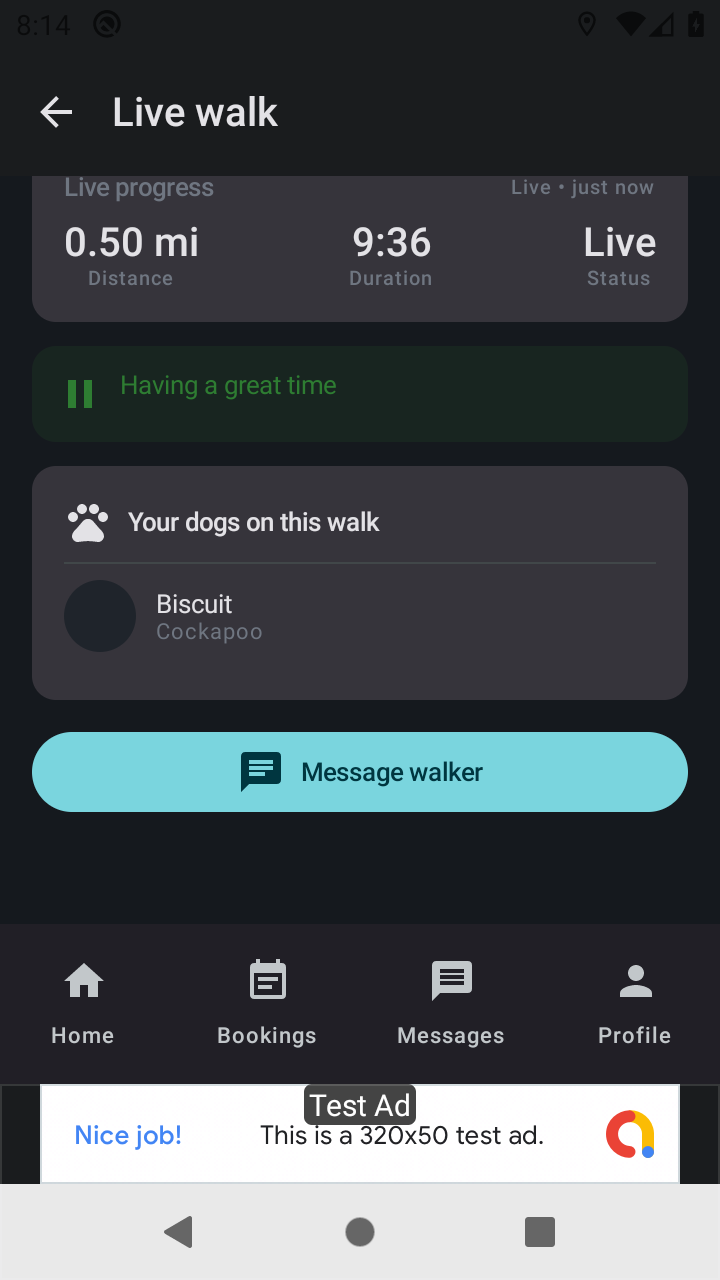
- Their Home shows a Walk in Progress card with Watch Live. Tapping it shows the map with your route, the distance, how long the walk has run, a Live status, your note, their dog and a Message walker button. Photos may not show on the live page yet.
6Take photos on the route
What you tap
- Tap Photo. The phone's camera opens. Take the picture and tap the tick. The button then shows Photo (1), and a small photo tile appears under the buttons.
What you see
- The Walk Console also has Pause and Mark bin buttons.
What the owner sees
- Your photos go onto the report card at the end of the walk.
7Finish the walk
What you tap
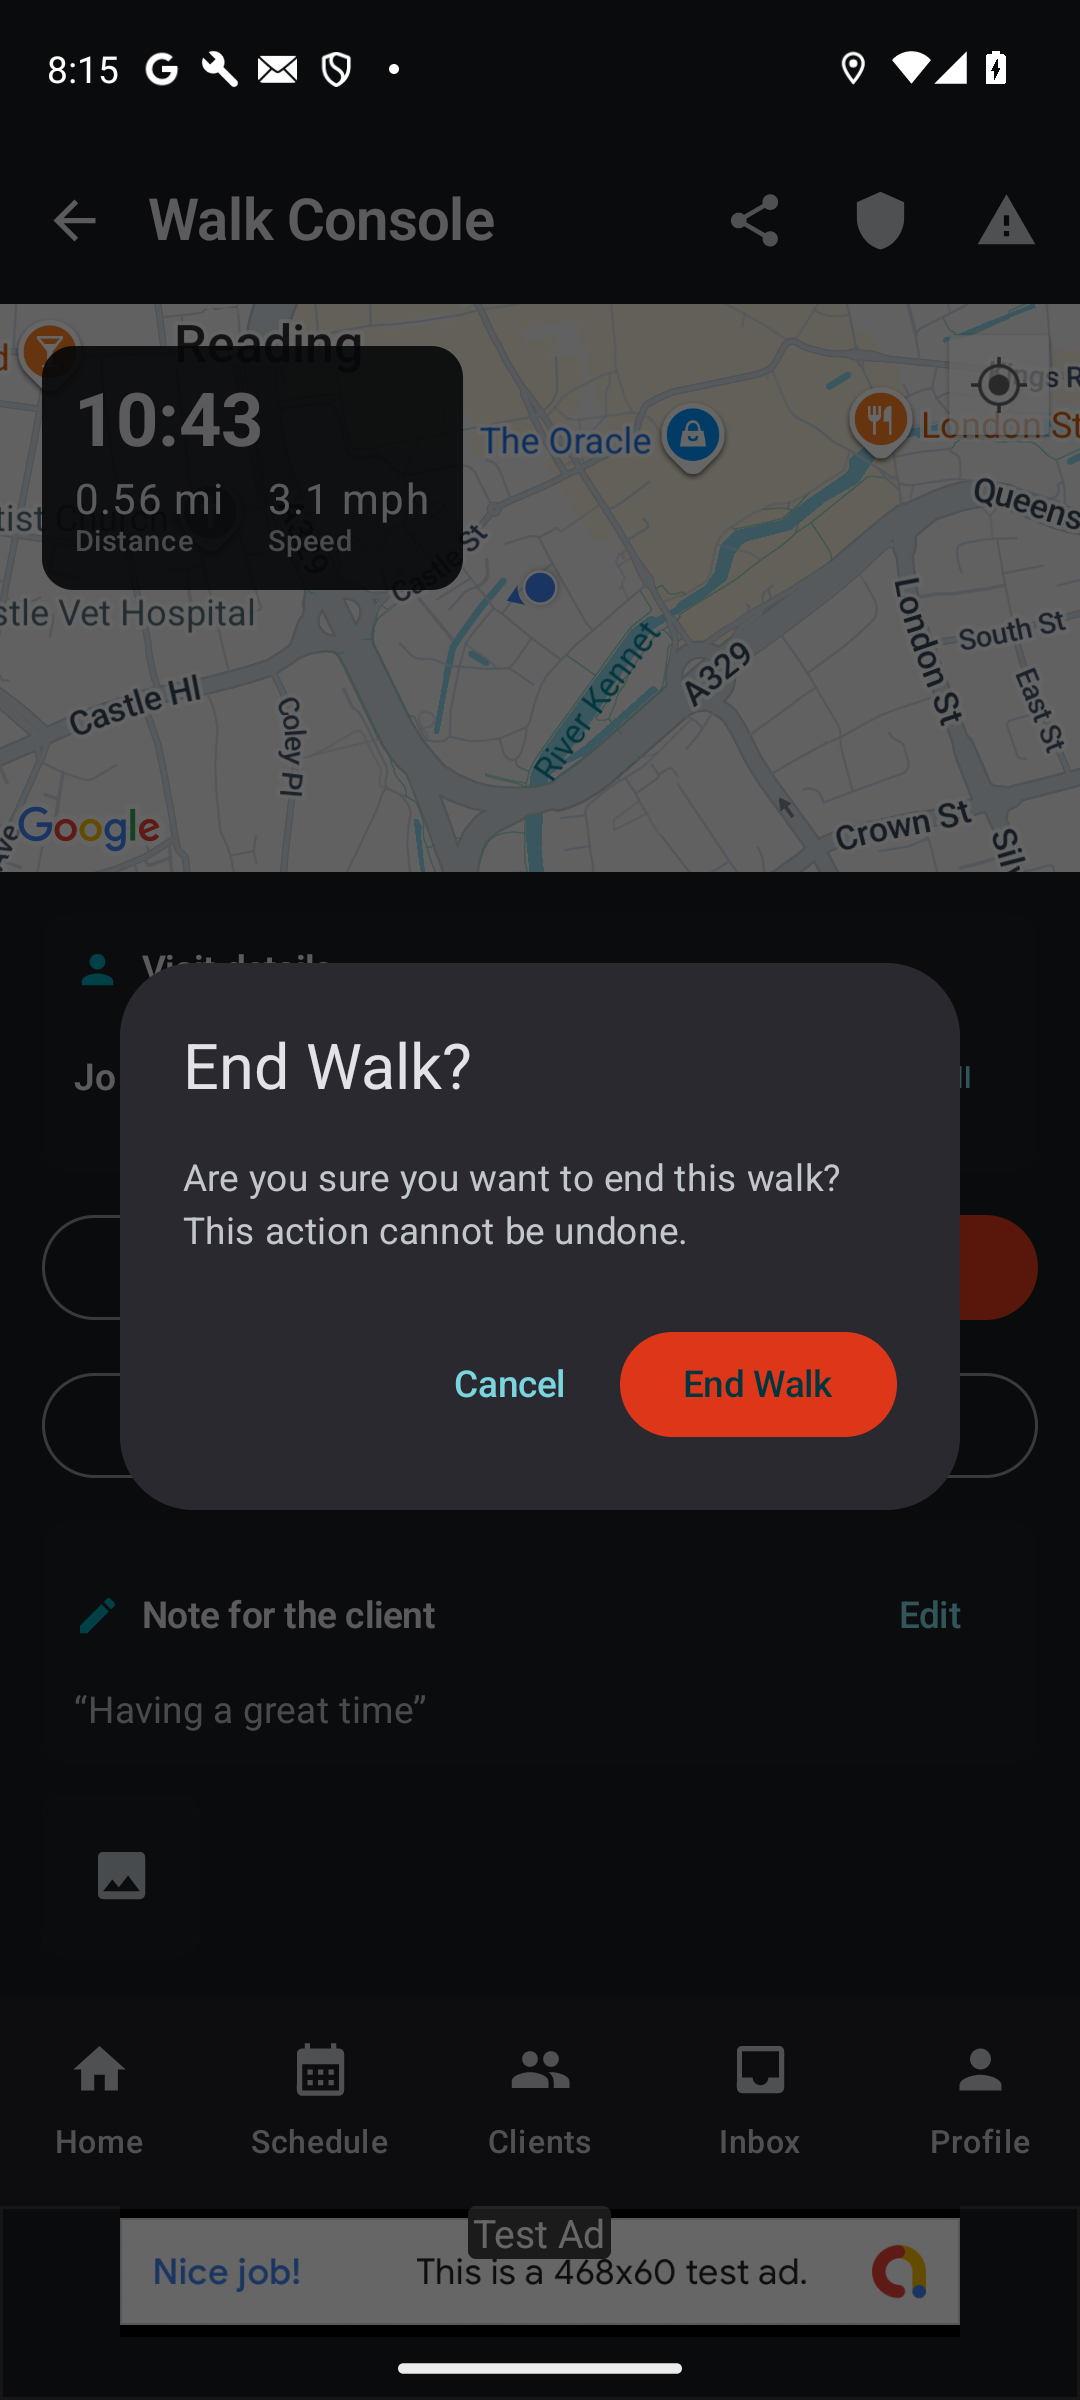
- Back at the owner's door, tap End Walk, then End Walk again in the box that asks End Walk?
What you see
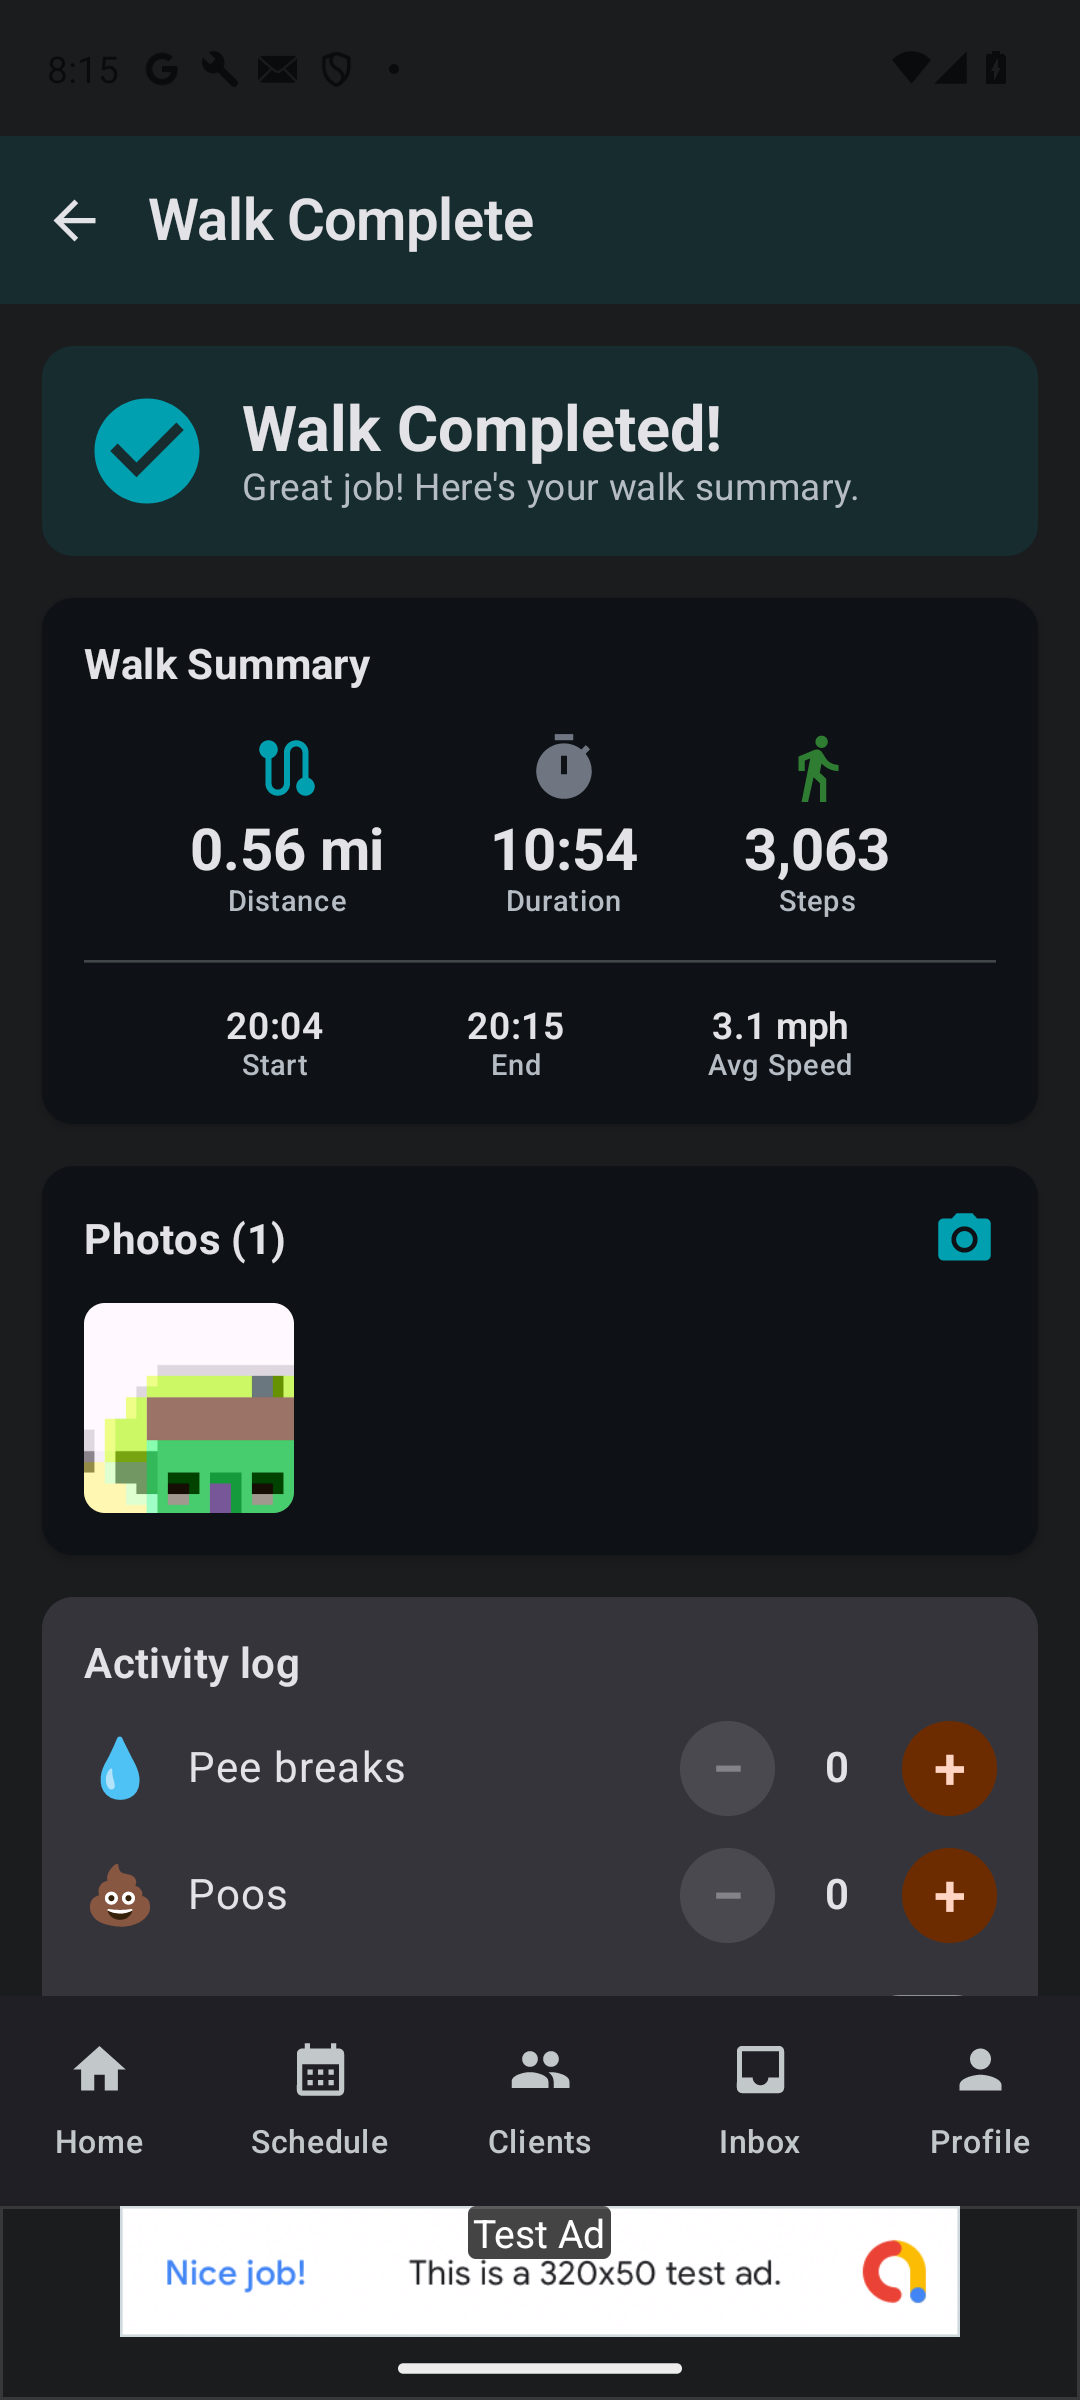
- The Walk Complete screen: Distance, Duration, Steps, Start, End and Avg Speed, then your photos (with a camera button if you want to add one).
8Fill in the report card
What you see
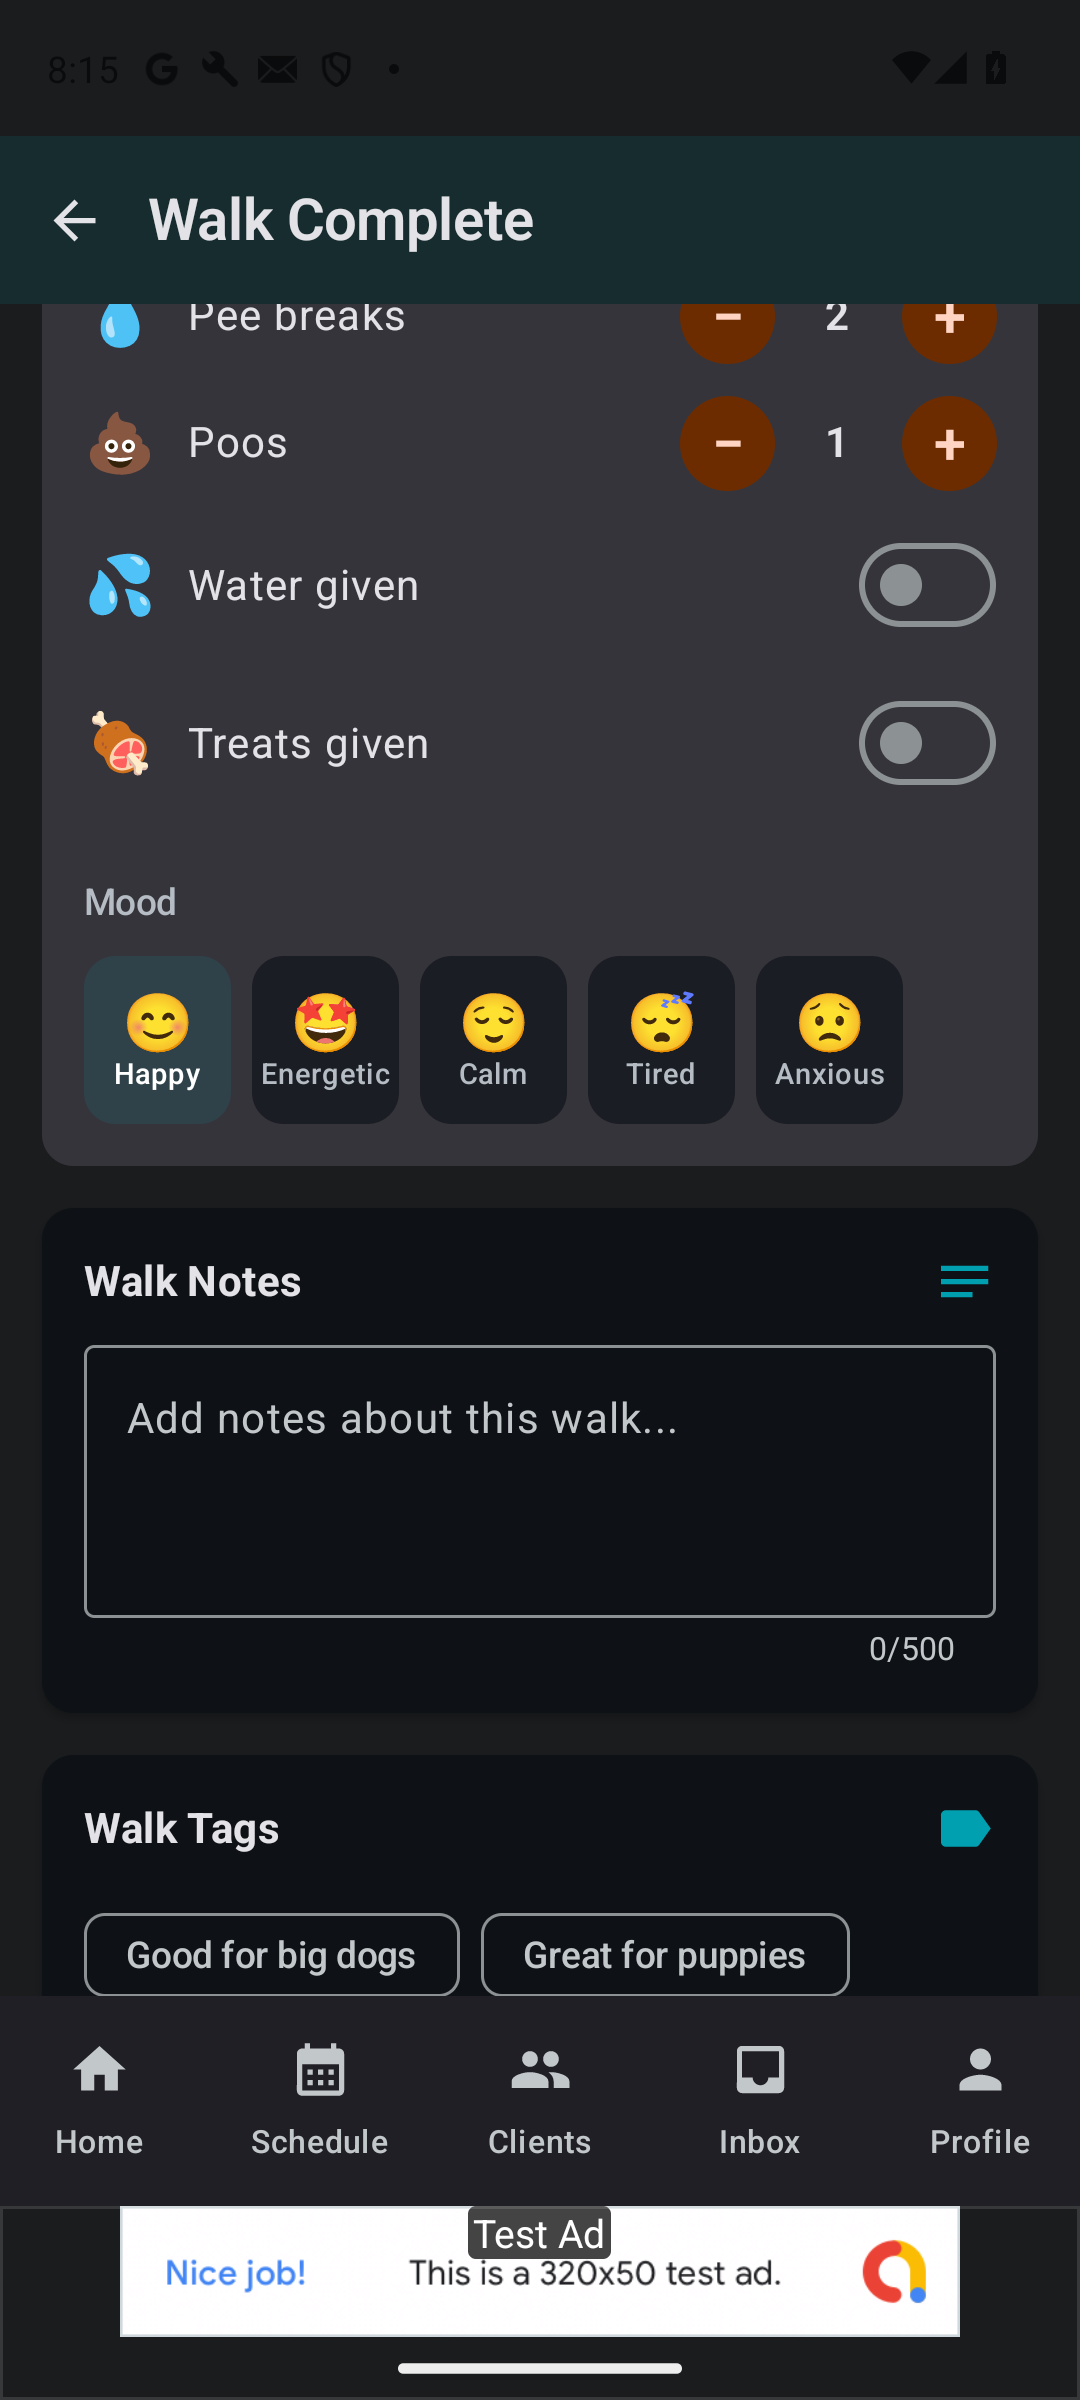
- The Walk Complete screen is the report card. The distance, time, steps and your photos are already filled in.
What you tap
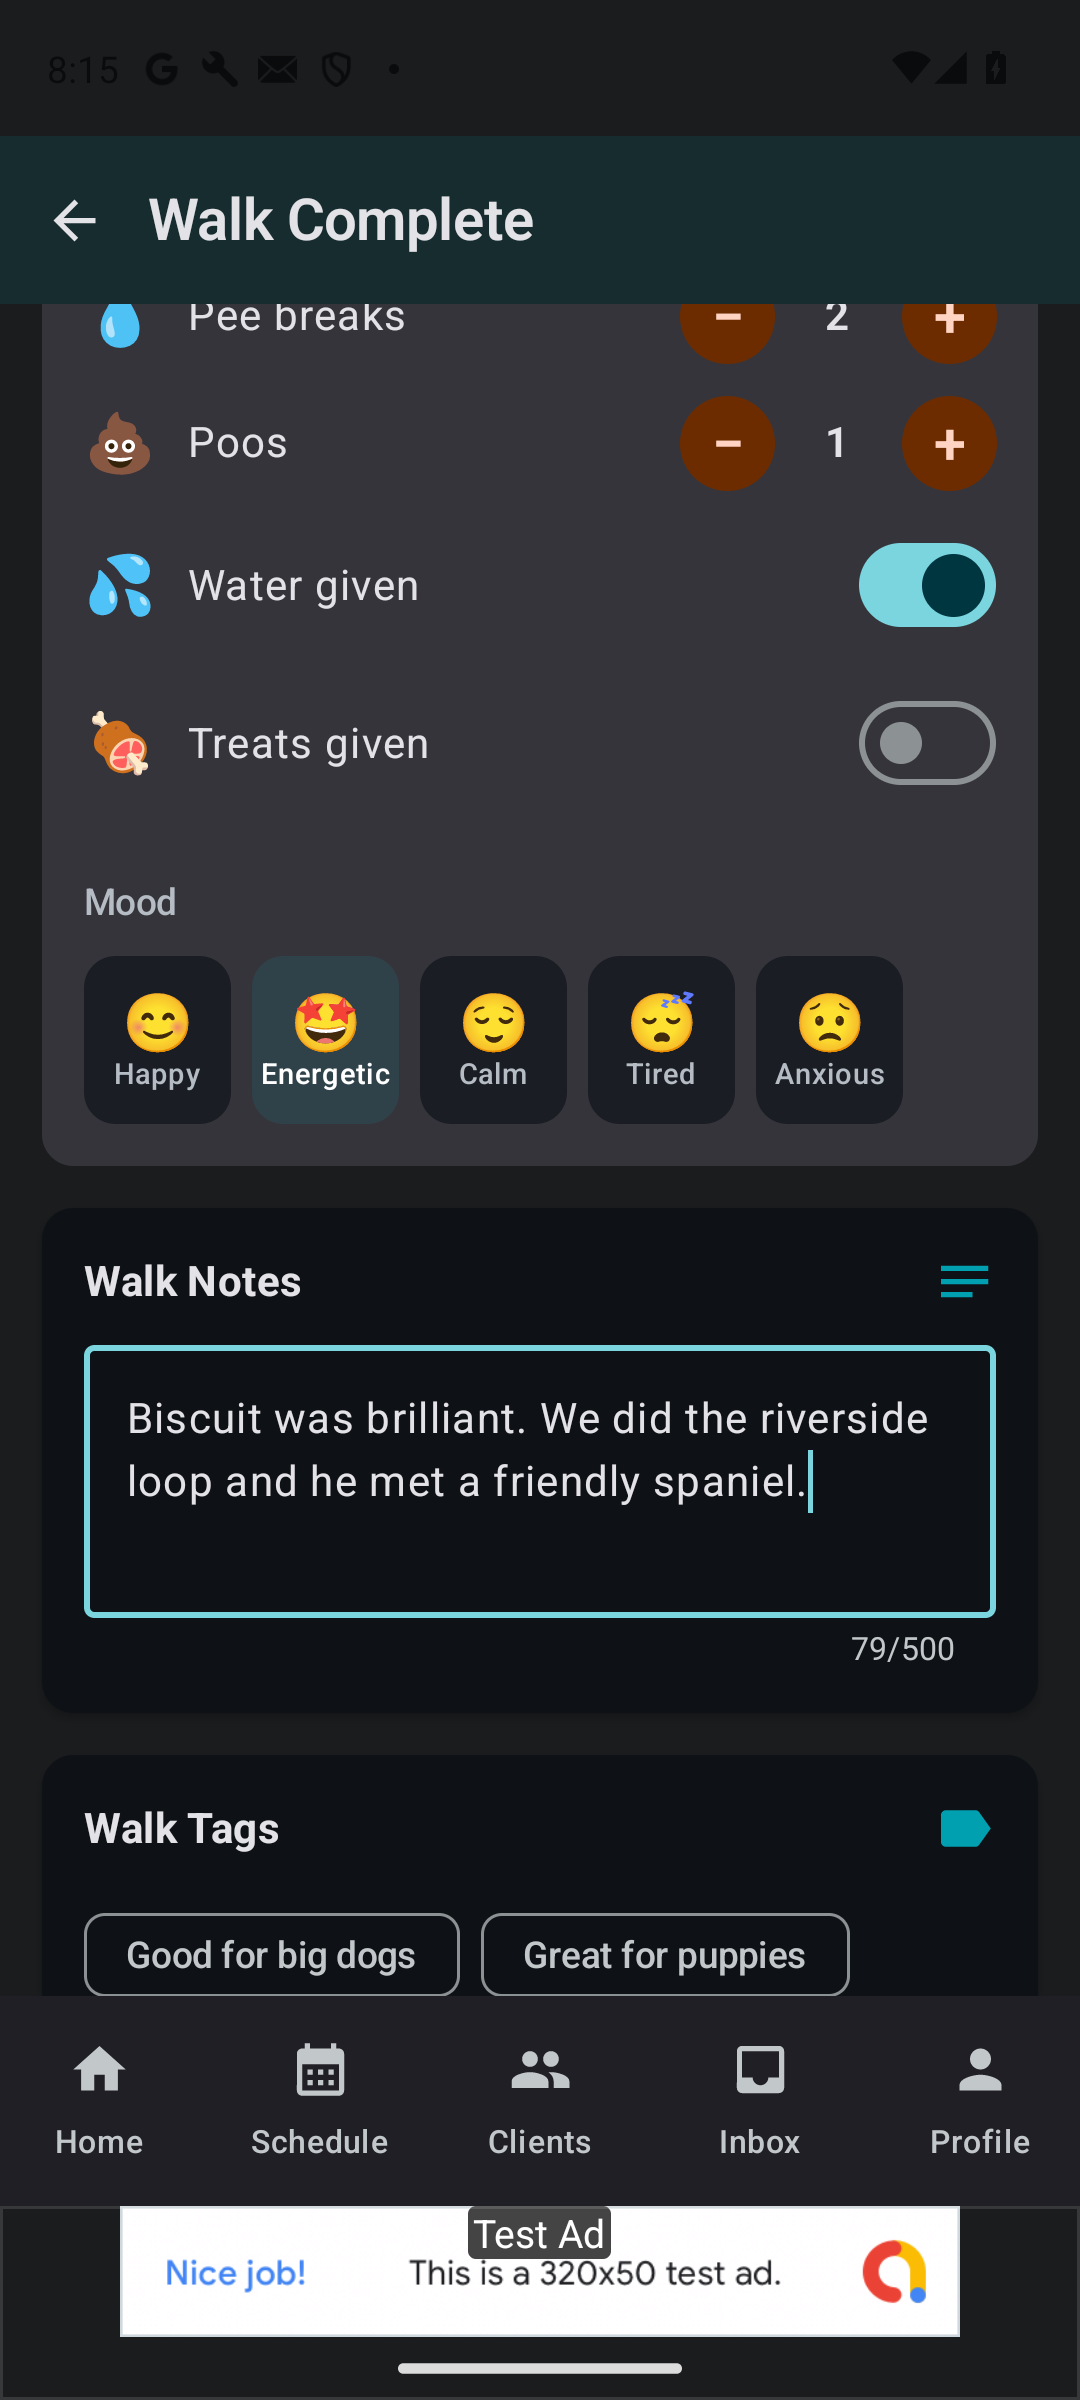
- Activity log: tap + for pee breaks and poos, and switch on Water given and Treats given if you did.
- Mood: tap one of Happy, Energetic, Calm, Tired or Anxious.
- Walk Notes: write a sentence or two for the owner (up to 500 characters). They see it in their Walk Report.
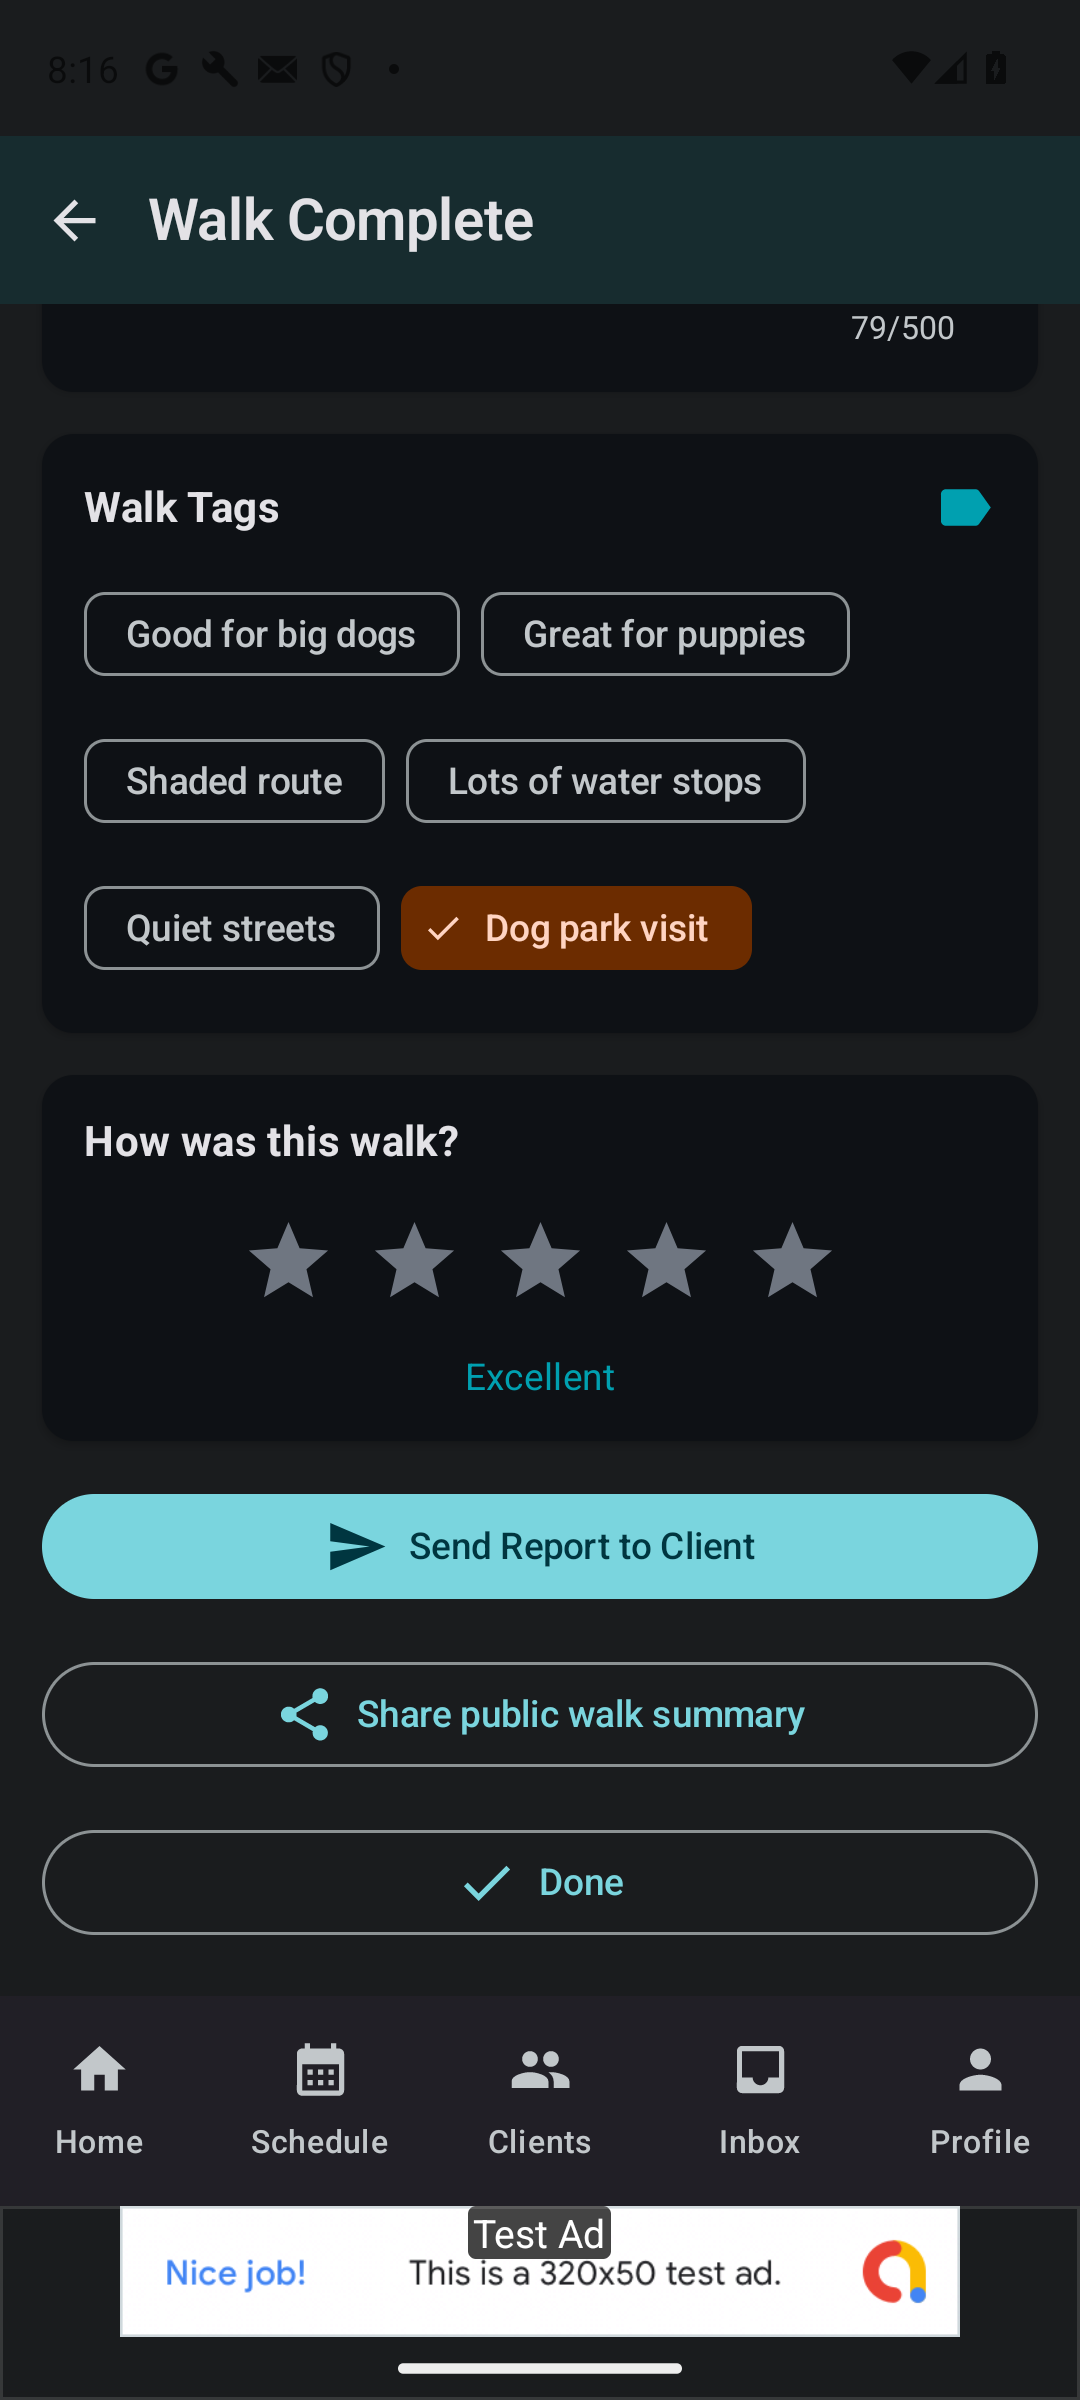
- Walk Tags and the How was this walk? stars describe the route for the public walks map, not a message to the owner. Skip them if unsure.
9Send the report card
What you tap
- Tap Send Report to Client. The app takes you back to your Home screen. There is no 'sent' message, but the report has been sent.
- Share public walk summary lets you share a public summary of the walk. It is not the owner's report.
What the owner sees
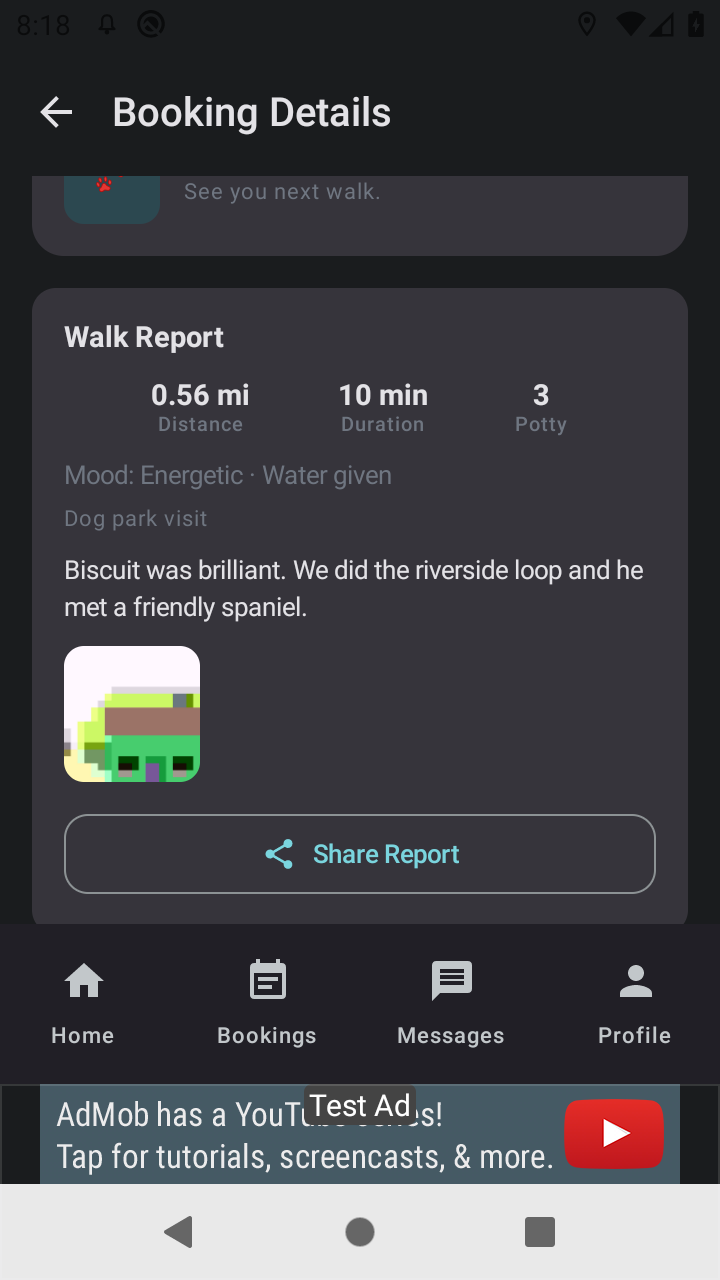
- In Bookings > Past the owner opens the walk and sees your note, 'Memories from the walk' (the live photos), a thank-you card and the Walk Report: distance, duration, toilet breaks, mood, notes and photo, with a Share Report button.
10Ask the owner to tap 'Yes, it happened'
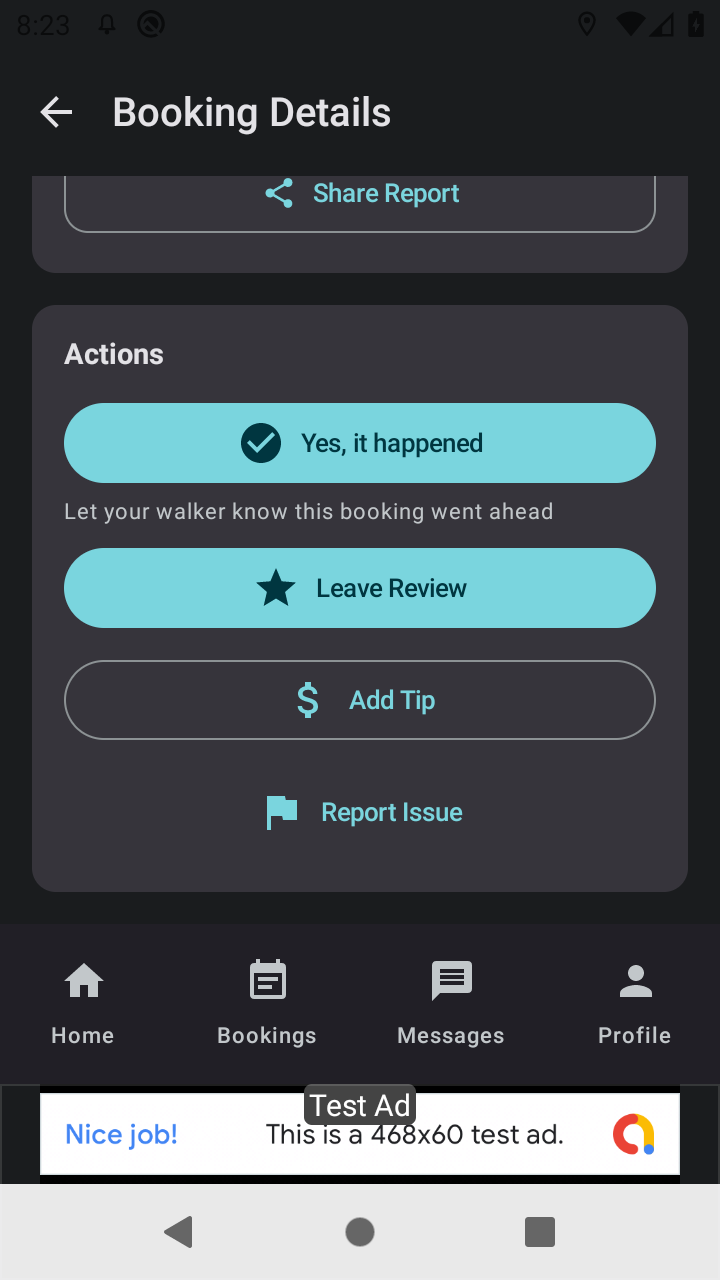
What you see
- At the bottom of the completed booking, the owner has Yes, it happened, Leave Review, Add Tip and Report Issue.
- Yes, it happened earns your starter credit: £2 for each of your first three bookings, and £5 for the first booking from each client you bring yourself (bookings of £10 or more). The credit pays WoofWalk's commission before your wallet.
What you tap
- Nothing in the app reminds the owner, so ask them when you hand the dog back: 'If you could tap Yes, it happened in the app, it helps me a lot.'
11Getting paid: card or cash
What you see
- Card booking (you connected Stripe): the owner pays by card through Stripe and Stripe pays it into your bank. There is nothing to do on the day.
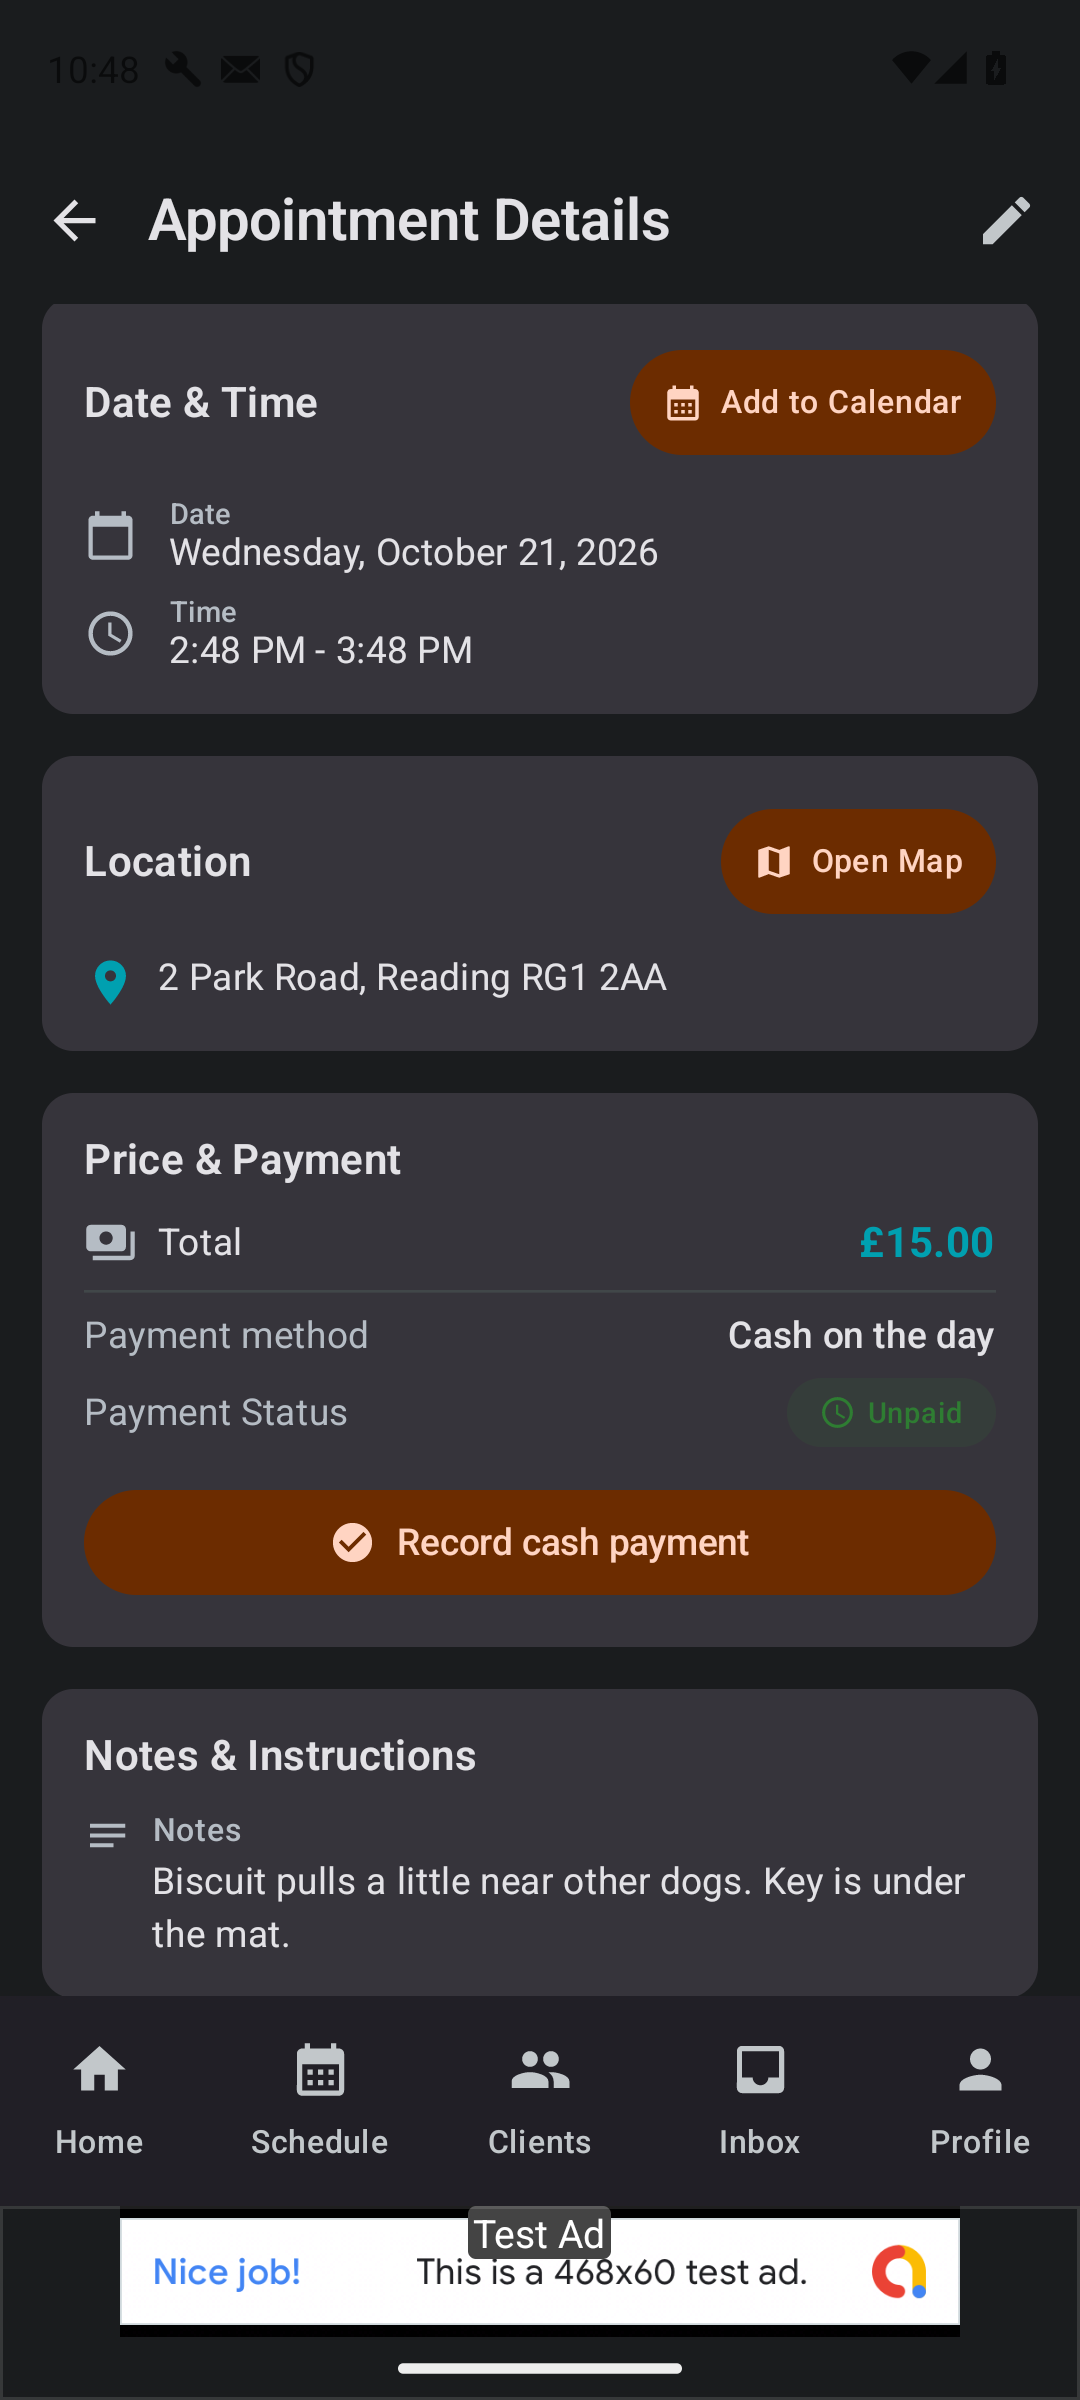
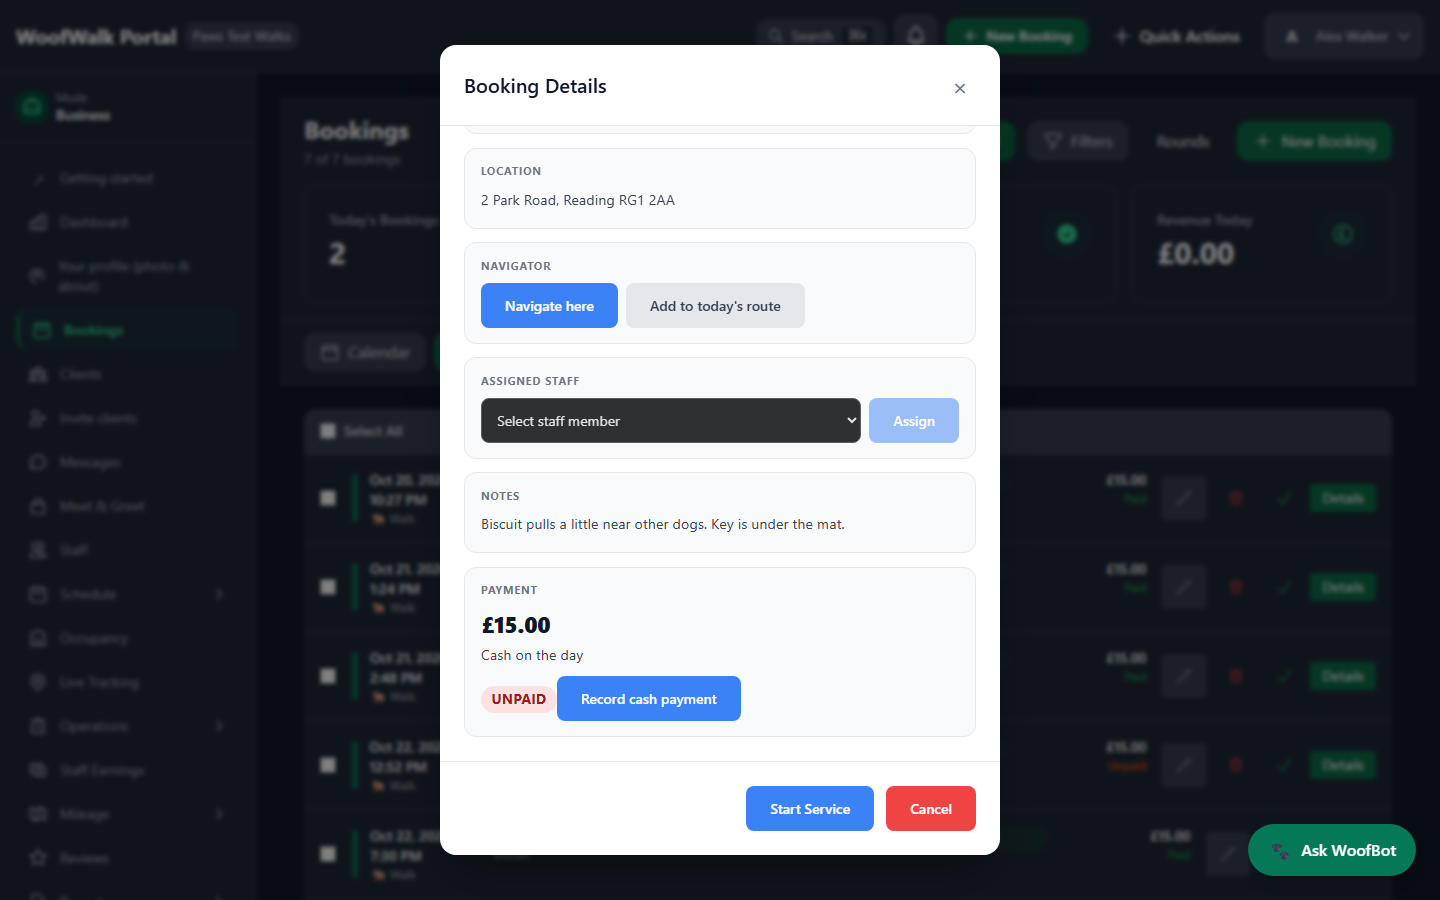
- Cash booking: the booking's Price & Payment box shows Cash on the day and Unpaid until you record the cash.
What you tap
- Collect the cash as agreed. Open the booking (Schedule, then Agenda, then tap it) and scroll down to Price & Payment. Tap Record cash payment.
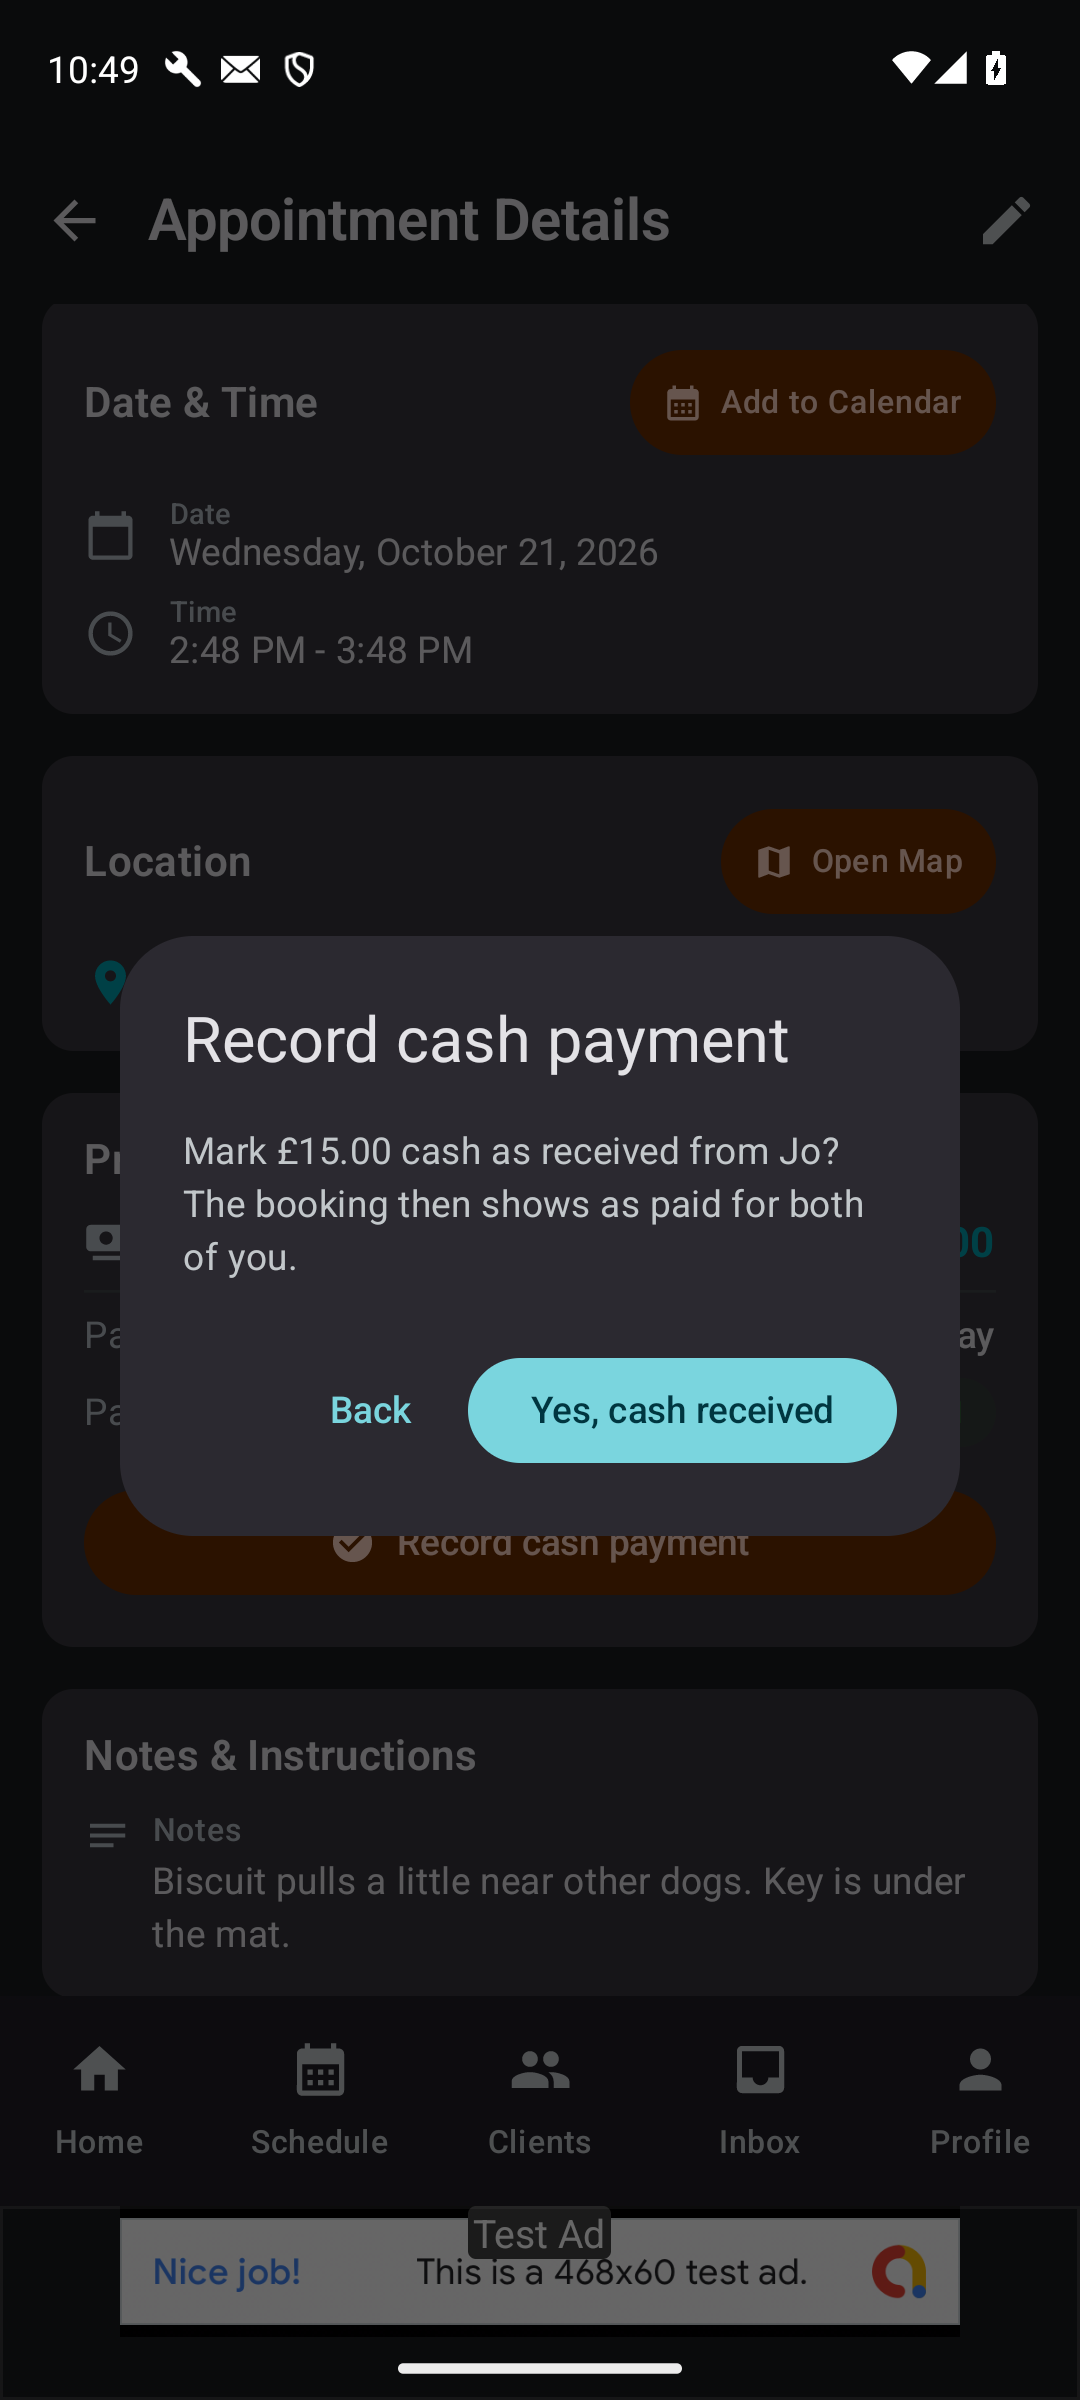
- A box asks 'Mark £15.00 cash as received from Jo?' (your price and your owner's name). Tap Yes, cash received.
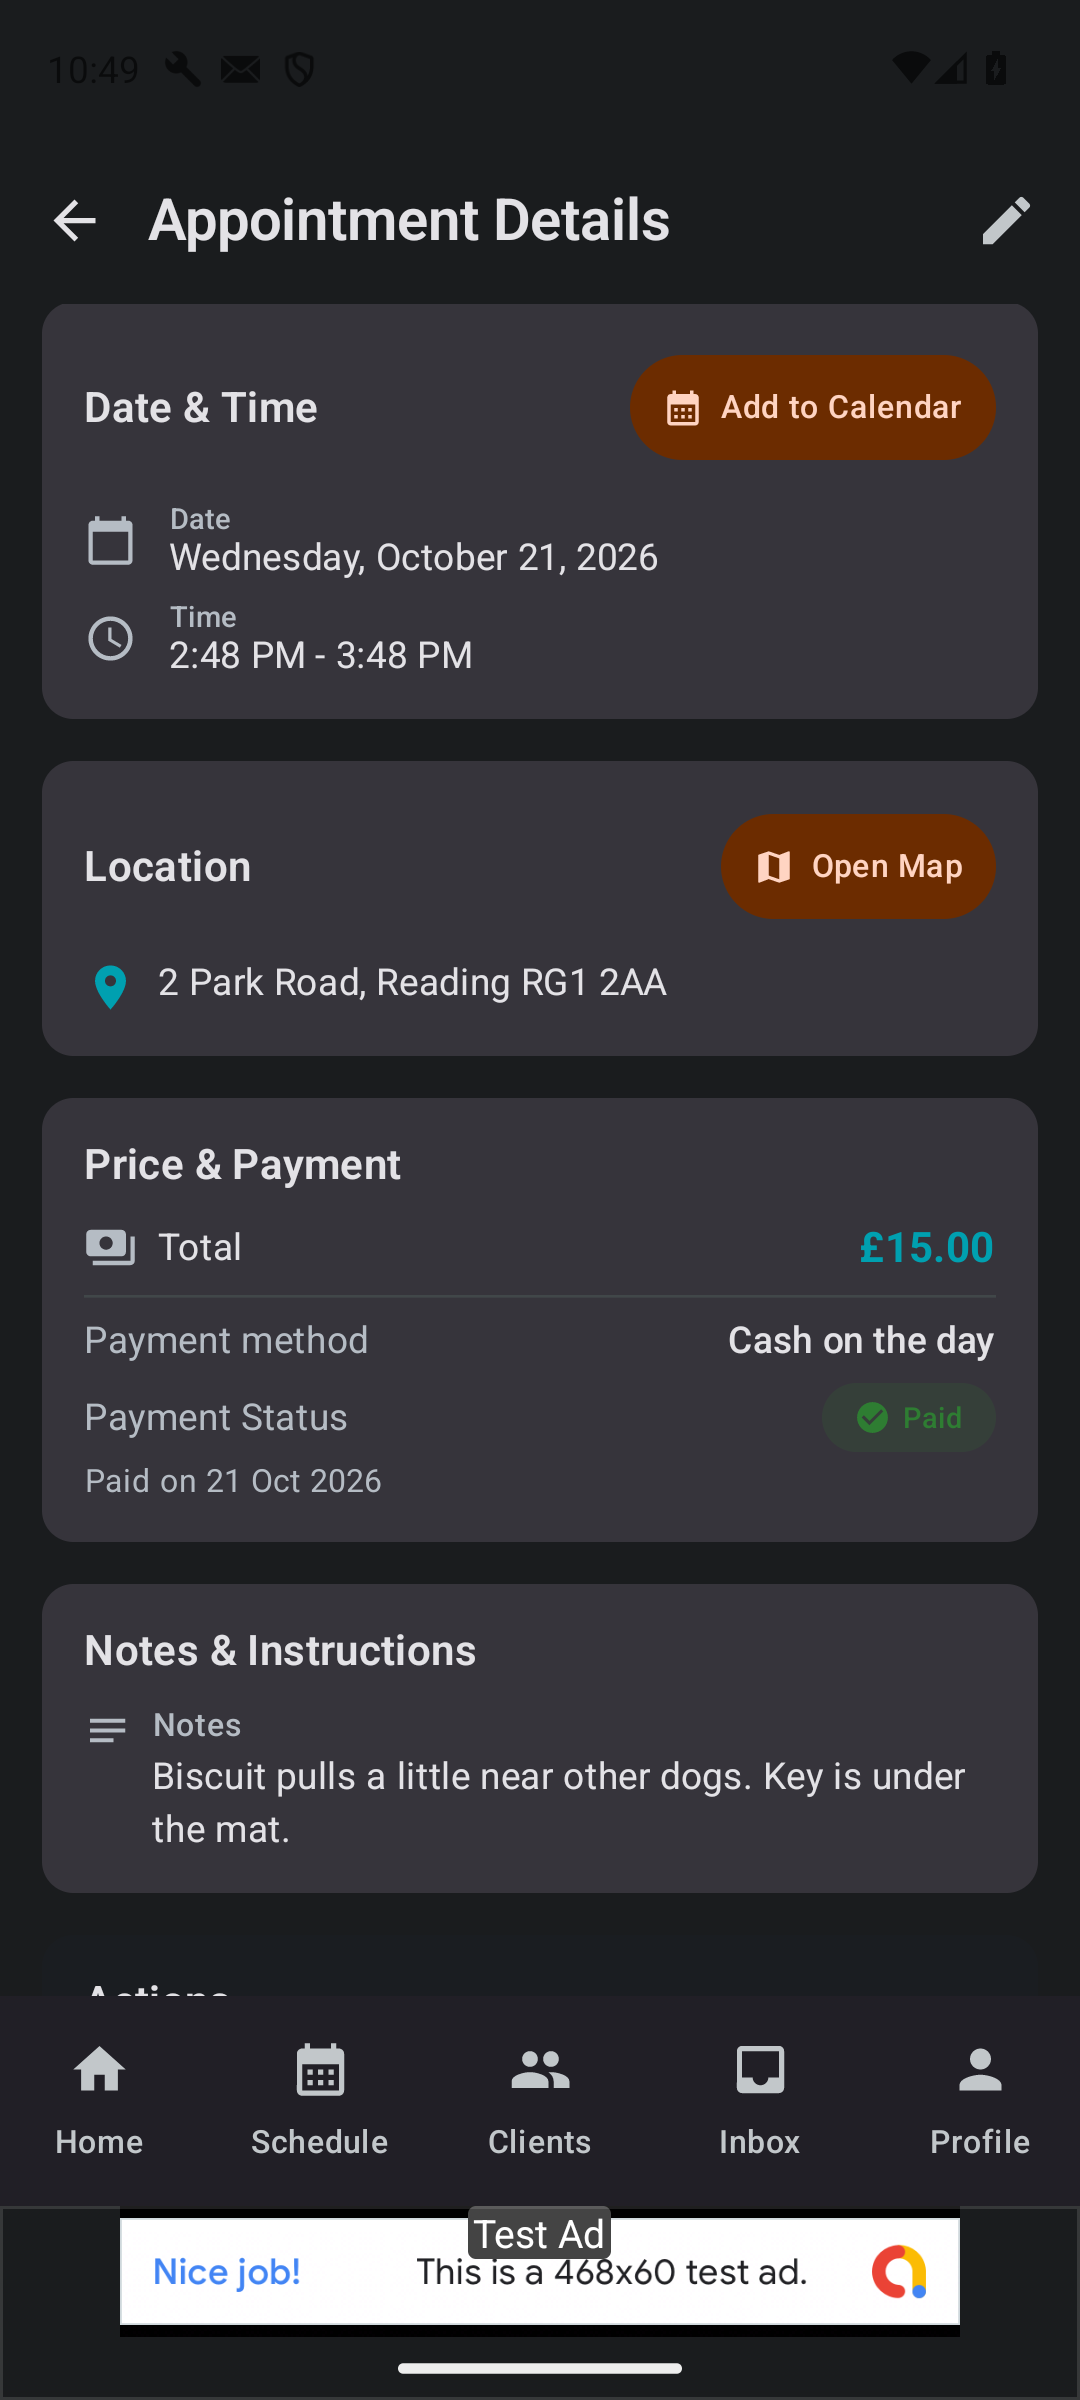
- The booking now shows Paid and Paid on today's date. Back on Home, the Earnings tile counts it.
What the owner sees
- The owner's copy of the booking shows Paid too, and they get a receipt by email.
On the website (woofwalk.app/business), open Bookings, press Details on the booking and press Record cash payment in the Payment box: it works the same way. If a cash owner wants a written invoice as well, you can type one out under Billing: Invoices, Create Invoice, Send Invoice. It is not linked to the booking, and nothing is sent automatically.
12Log your mileage (it comes off your tax)
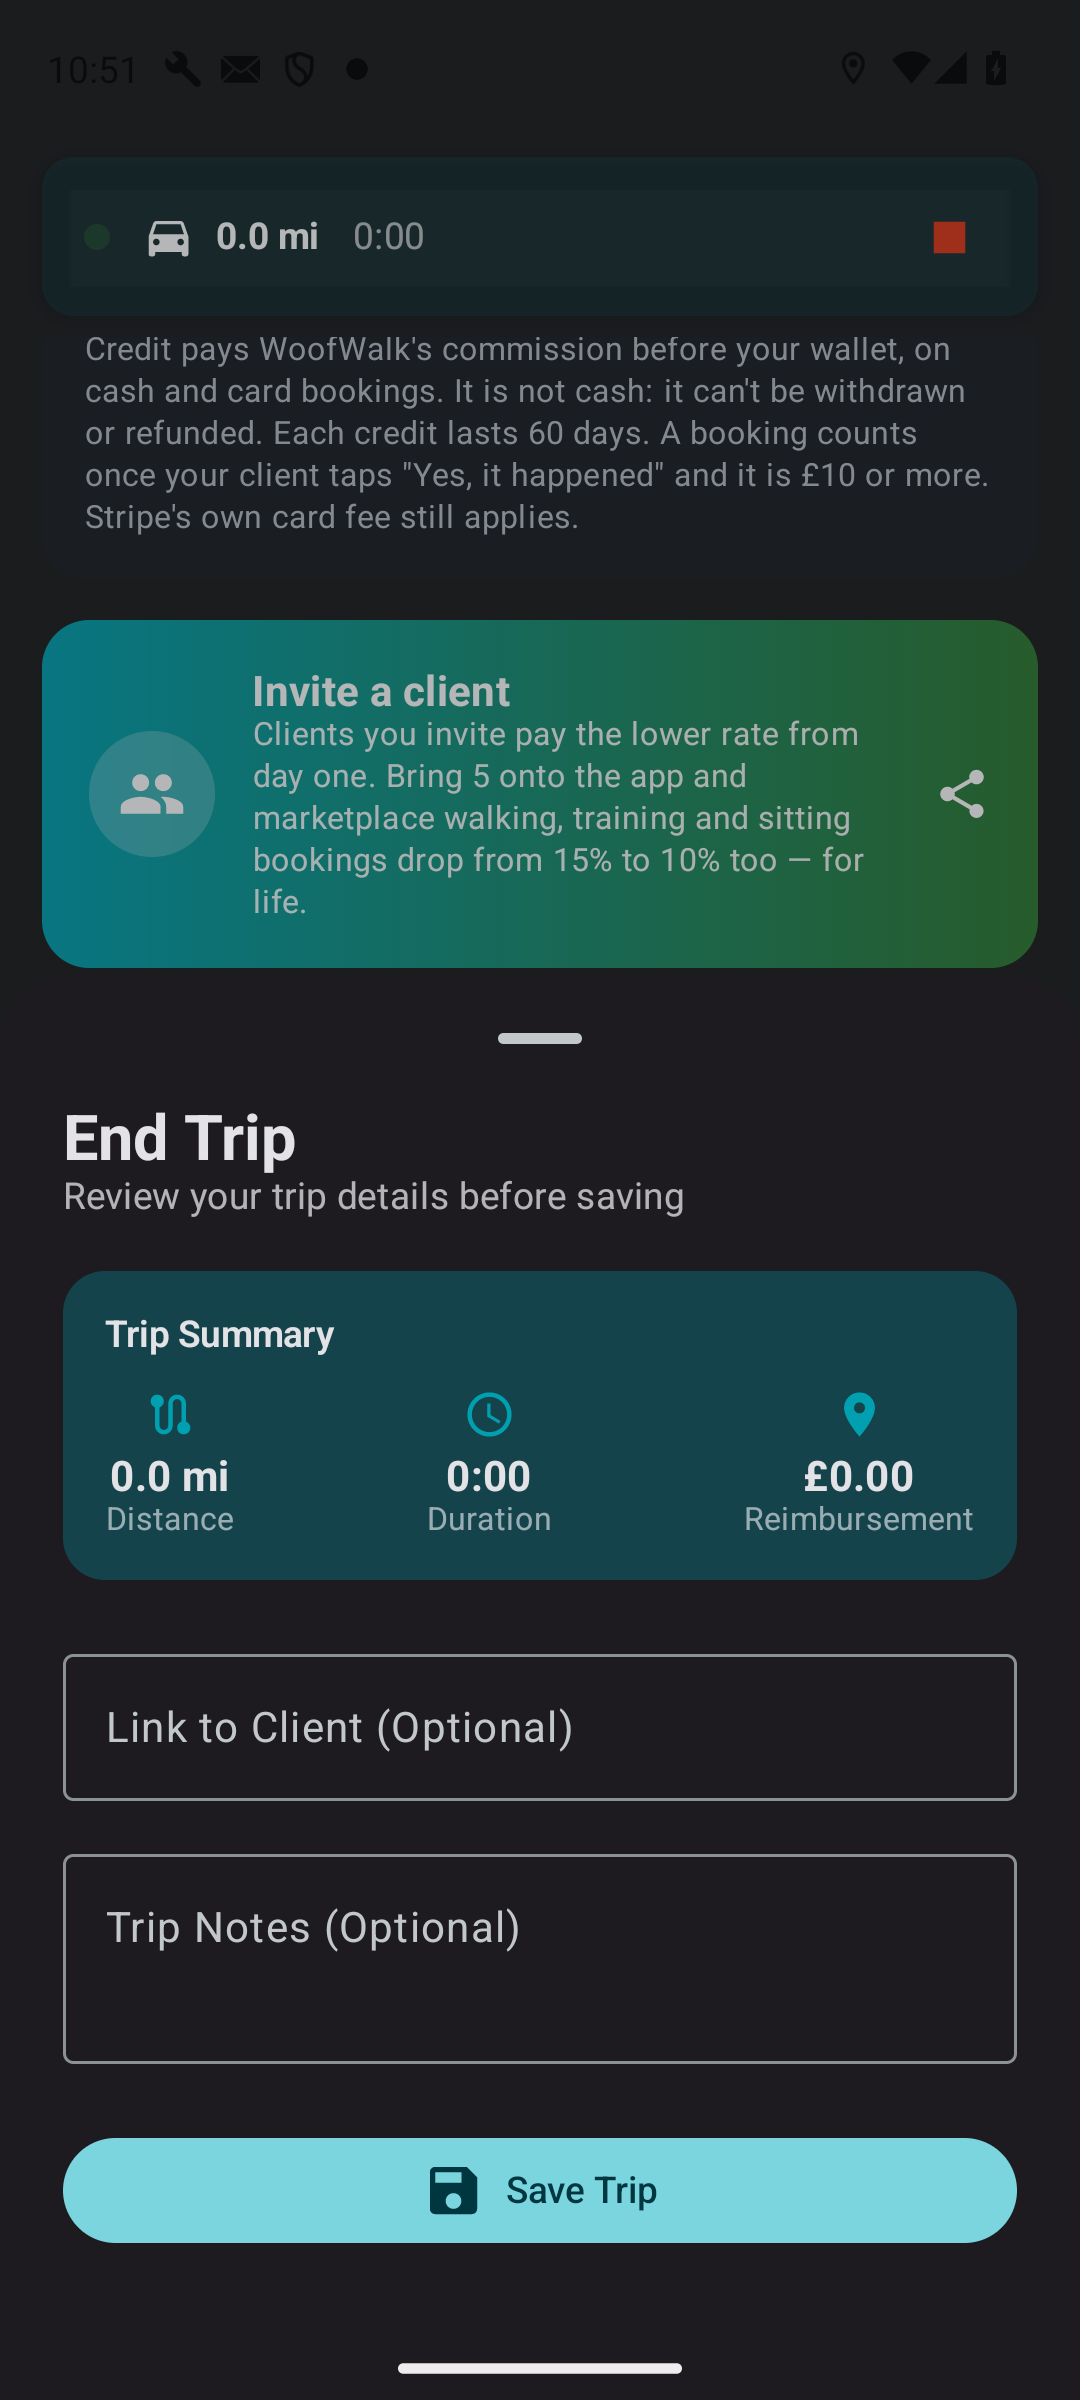
What you tap
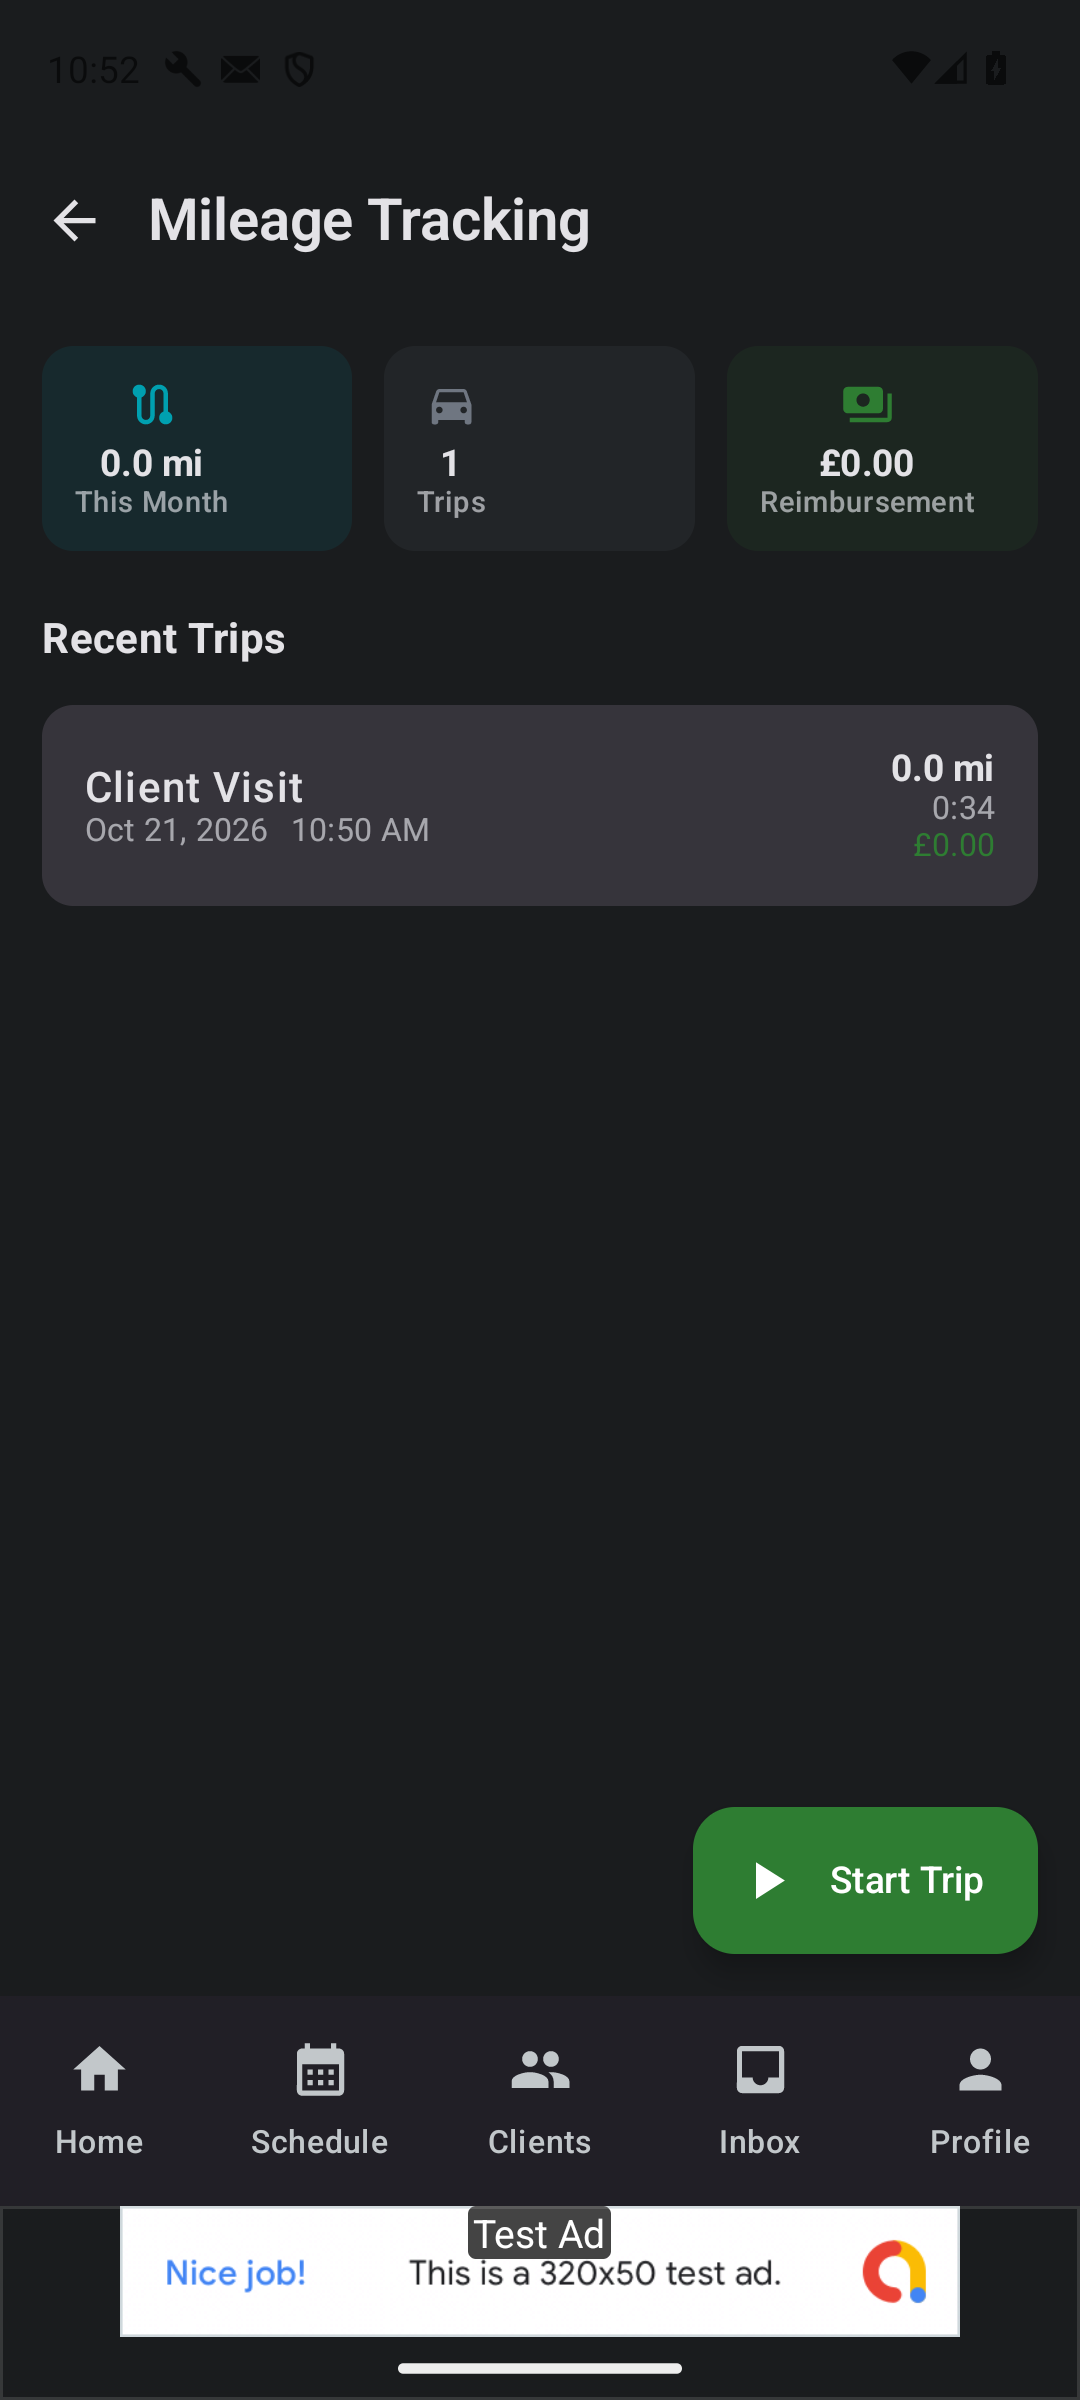
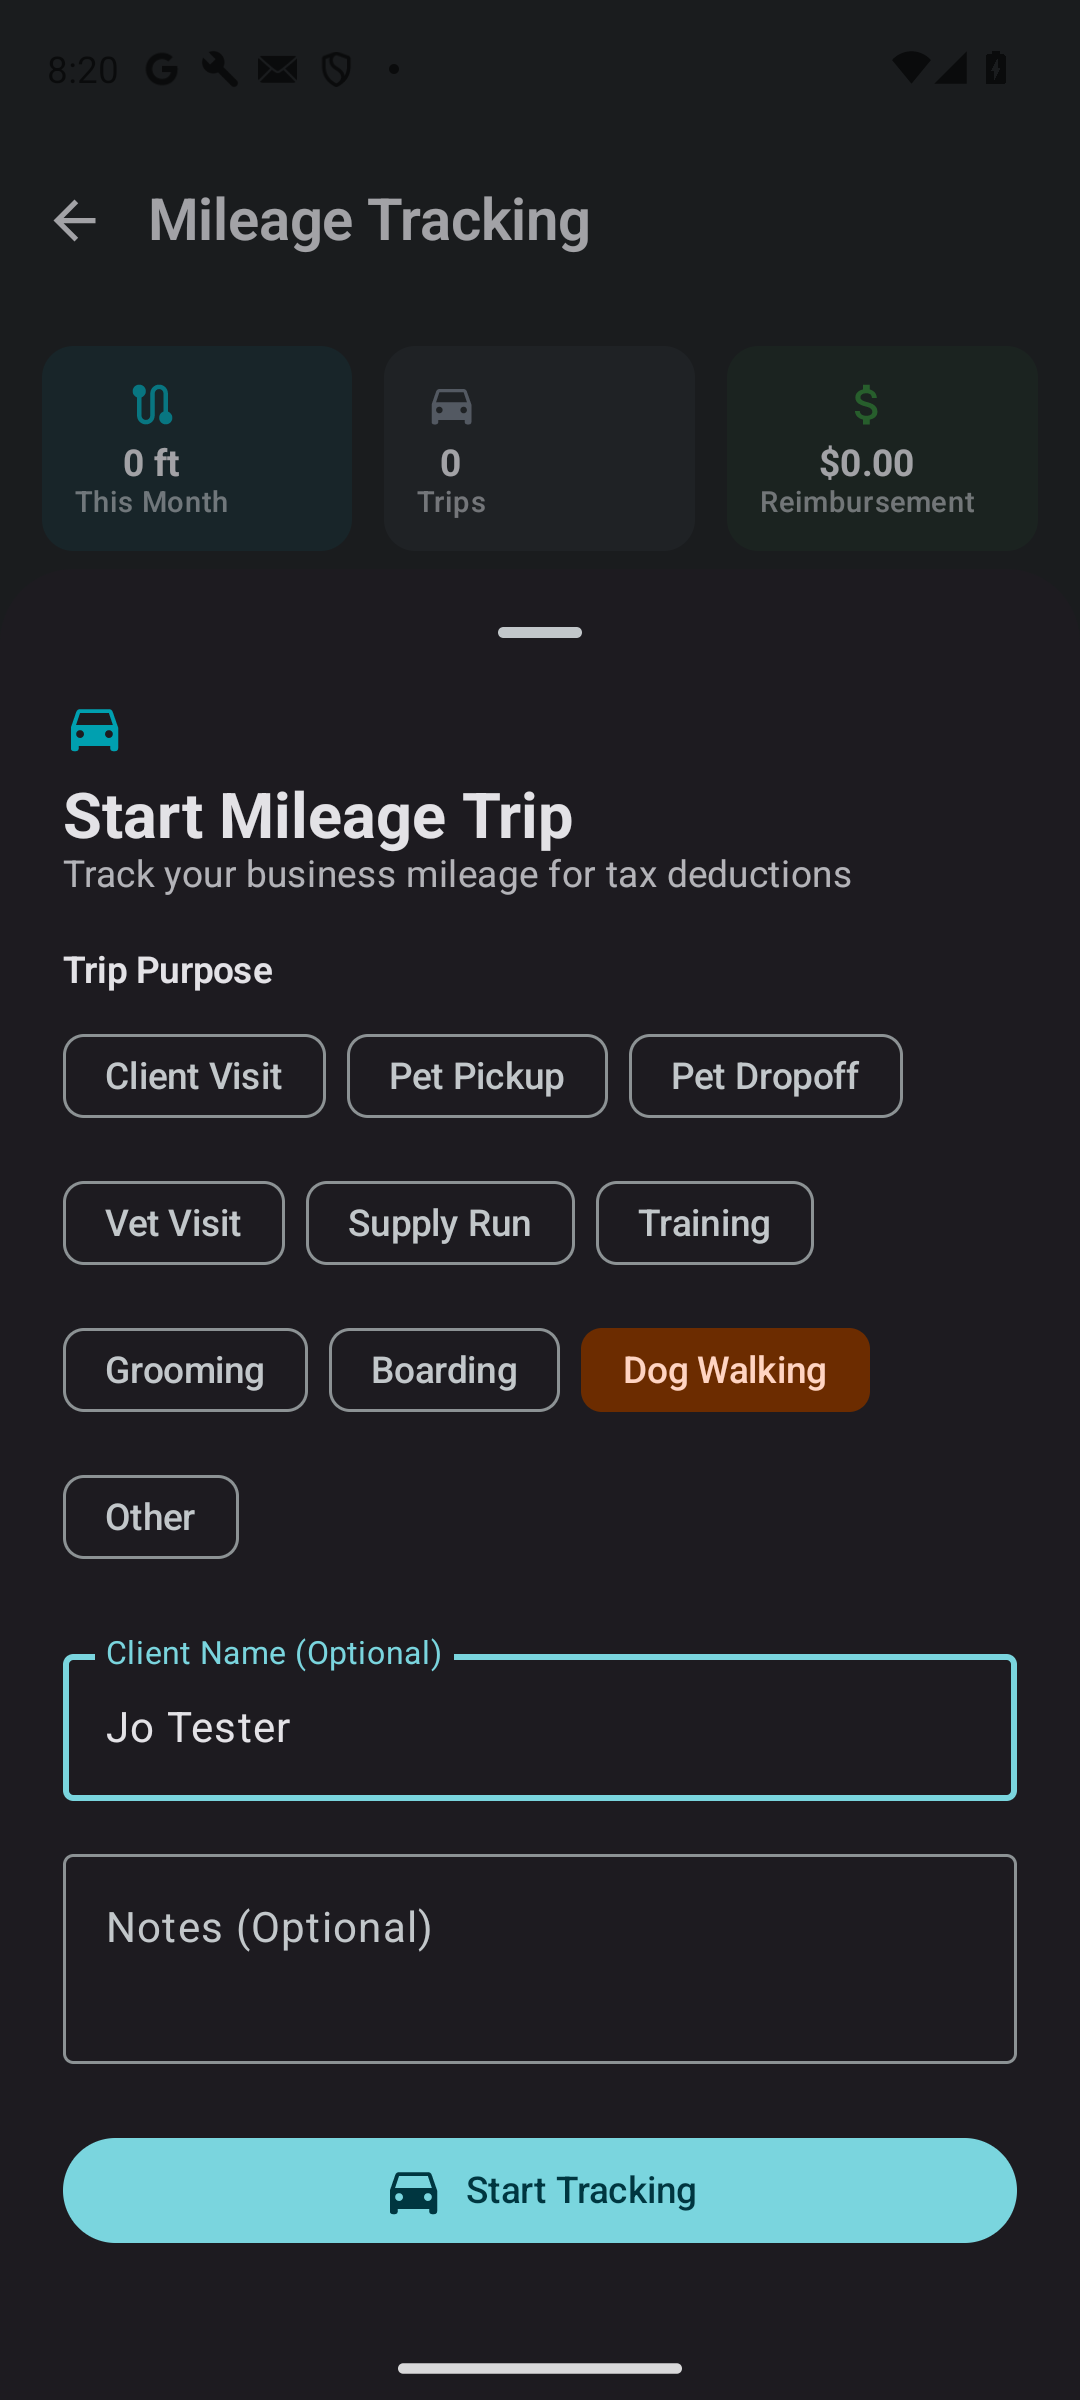
- On Home, tap the Mileage tile, then Start Trip. Pick a Trip Purpose (for example Dog Walking or Client Visit), type the client's name if you like, and tap Start Tracking.
- Drive. The bar at the top counts the miles. When you arrive, tap Stop Trip, check the Trip Summary (distance, duration and the HMRC allowance at 45p a mile) and tap Save Trip.
What you see
- Mileage is for driving between jobs, not the walk itself. The walk's distance is already on the report card.
The four slip-ups almost everyone makes once
- Forgetting to tap the share icon and send the link, so the owner never gets live tracking.
- Tapping Done on the report card instead of Send Report to Client, which can lose the report.
- Saying no to location permission, so the walk has no route or distance.
- Forgetting to ask the owner to tap Yes, it happened, so your starter credit never arrives.
That's it
Next time, steps 4 to 9 take about a minute of tapping. If anything on this page does not match what you see on your phone, reply to the email that brought you here, or write to hello@woofwalk.app, and we will fix the guide.